Get a Quote
Are you looking to make a Unity shooting game or specifically, a First Person Shooter (FPS) game using Unity? You have come to the right place. Games like Quake, Counter-Strike, Call of Duty, etc, were among the first FPS games that brought about a revolution in the PC gaming industry. And now, we have new entries, such as Doom (2016) and Battlefield Hardline, taking the FPS gaming experience to a whole new level altogether. In this blog, we will learn to make a shooting game, which in our case is an FPS, in Unity.
The Unity version we are going to use for this game is Unity Personal Edition Version 5.5.1 f1. The reason I chose Unity game development for our FPS game is that it rids the need of using complex maths for 'movement' and 'looking around with the Mouse’.
Prerequisites to Build a Shooting Game in Unity
You need to have basic understanding of C# and maths for building your first FPS game in Unity. Besides, you need to have some knowledge of Unity app development and get familiar with the Unity interface and basic scripting concepts.
The First Shooter Elements To Consider for This Game are as Follows:
- WSAD-Maneuver & Jumping
- A weapon
- Bullets that explode when hit
- Point and shoot with the Mouse
- A decent looking level
- Something to shoot at
The most important concept in the Unity Editor is the GameObject. Every object that you want to create in your game has to be a GameObject. However, you need to add components to a GameObject to give it properties, so that it can become a character, an environment, or a special effect. You can add different combinations of components to a GameObject based on the kind of object you want to create.
Let’s begin with Project & Scene Setup
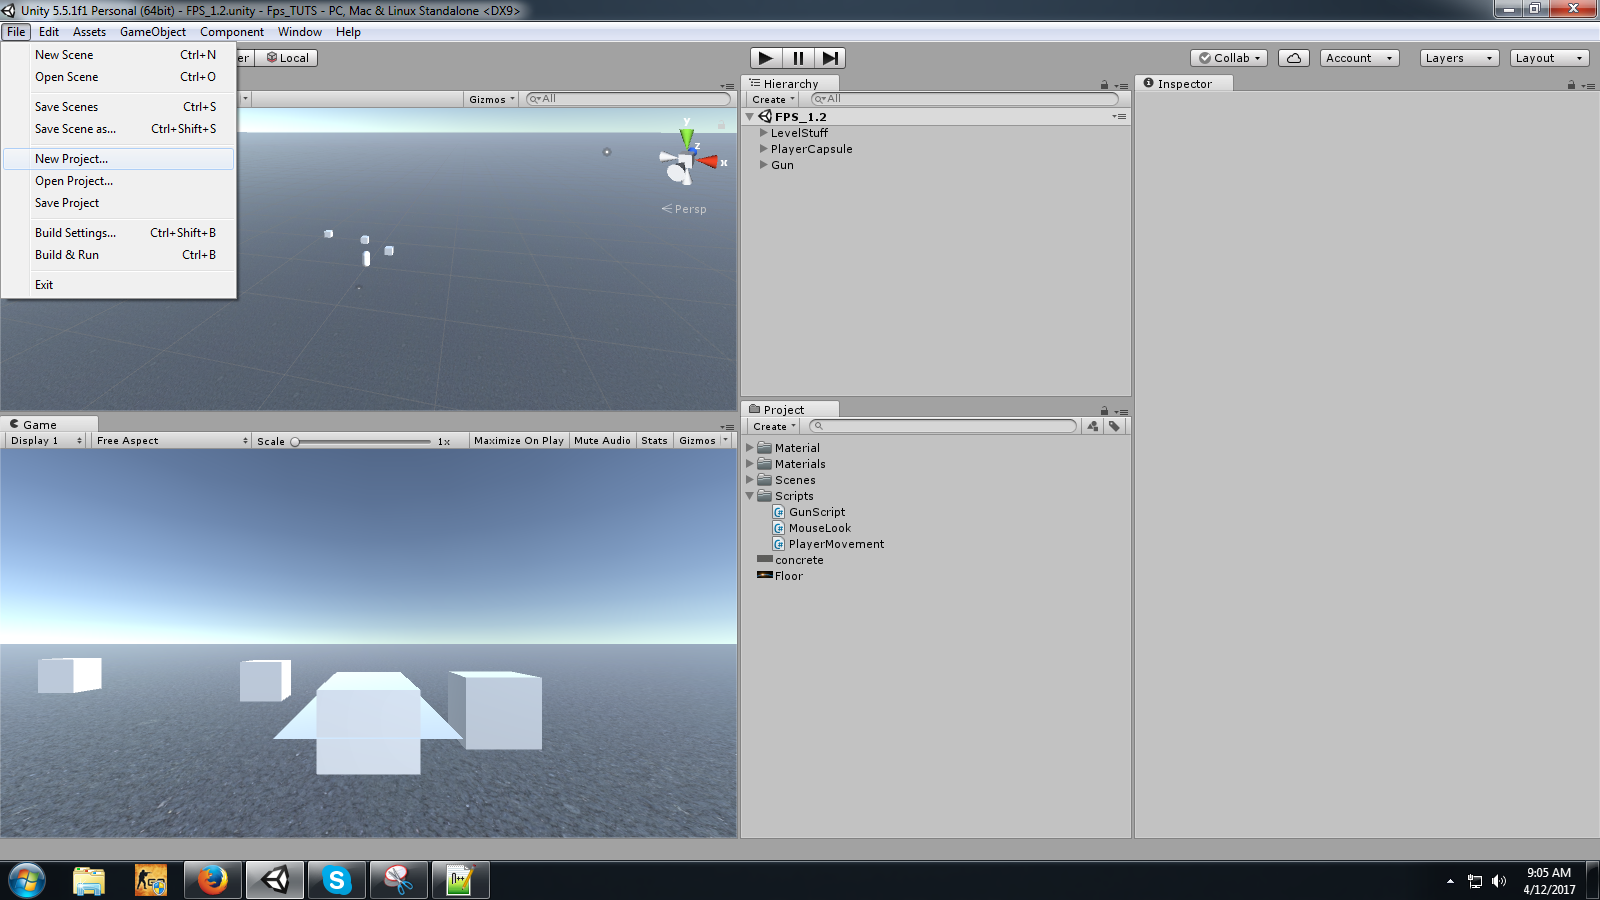
First, we are going to create a new project by going up to “File” and clicking on “New Project”. The next step is to give our new project a name and save in desired location.
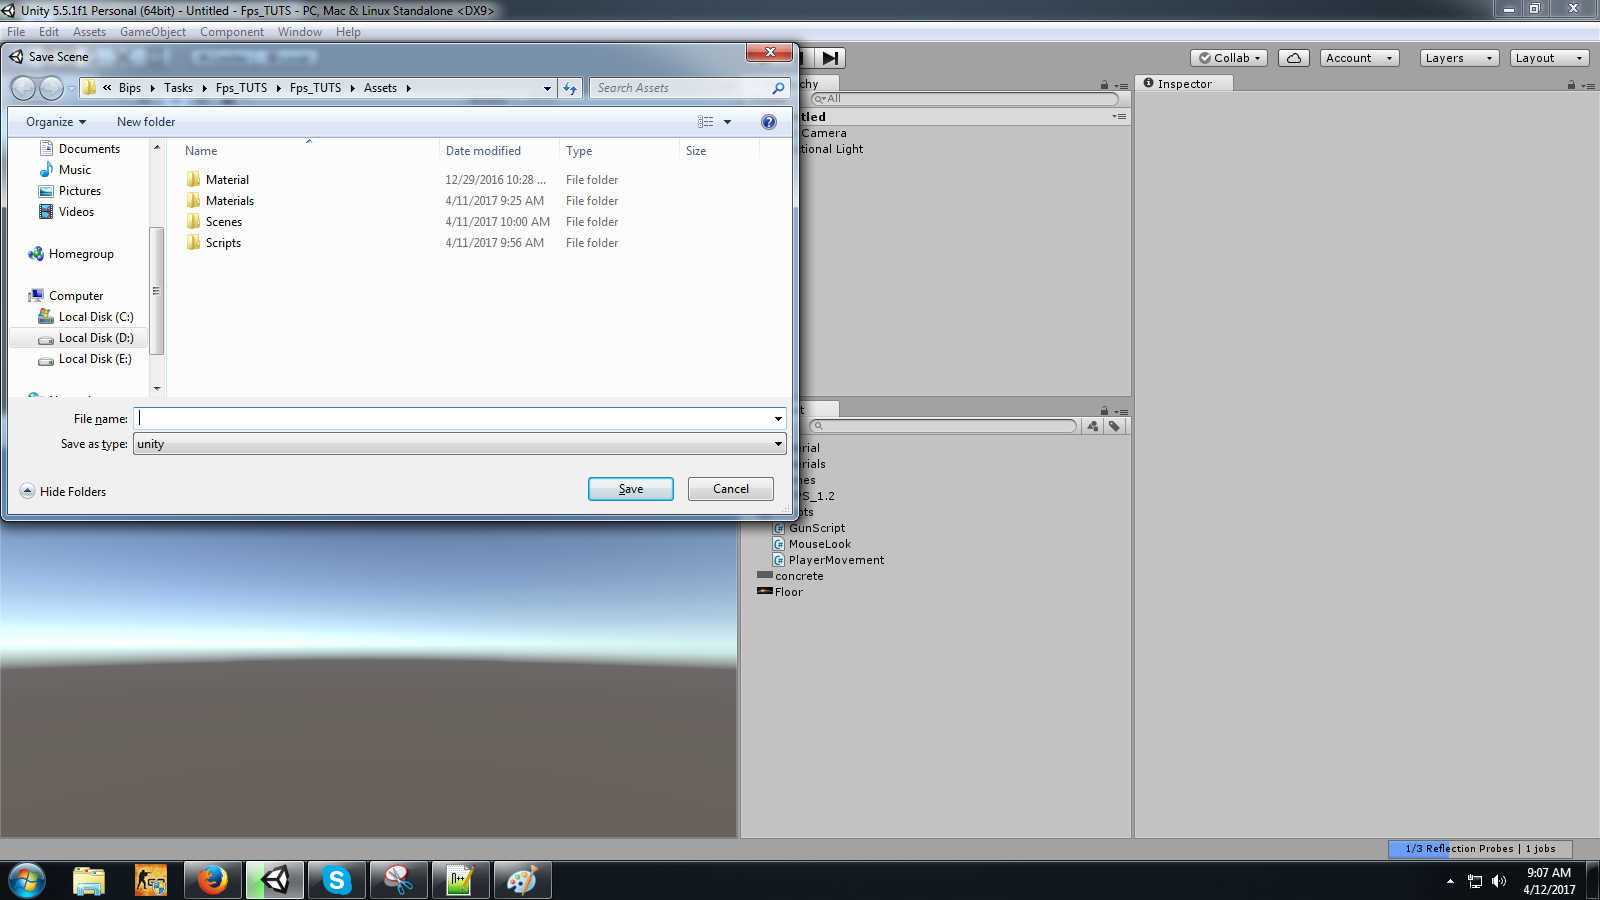
Now, we will save the default scene (with desired or default name)
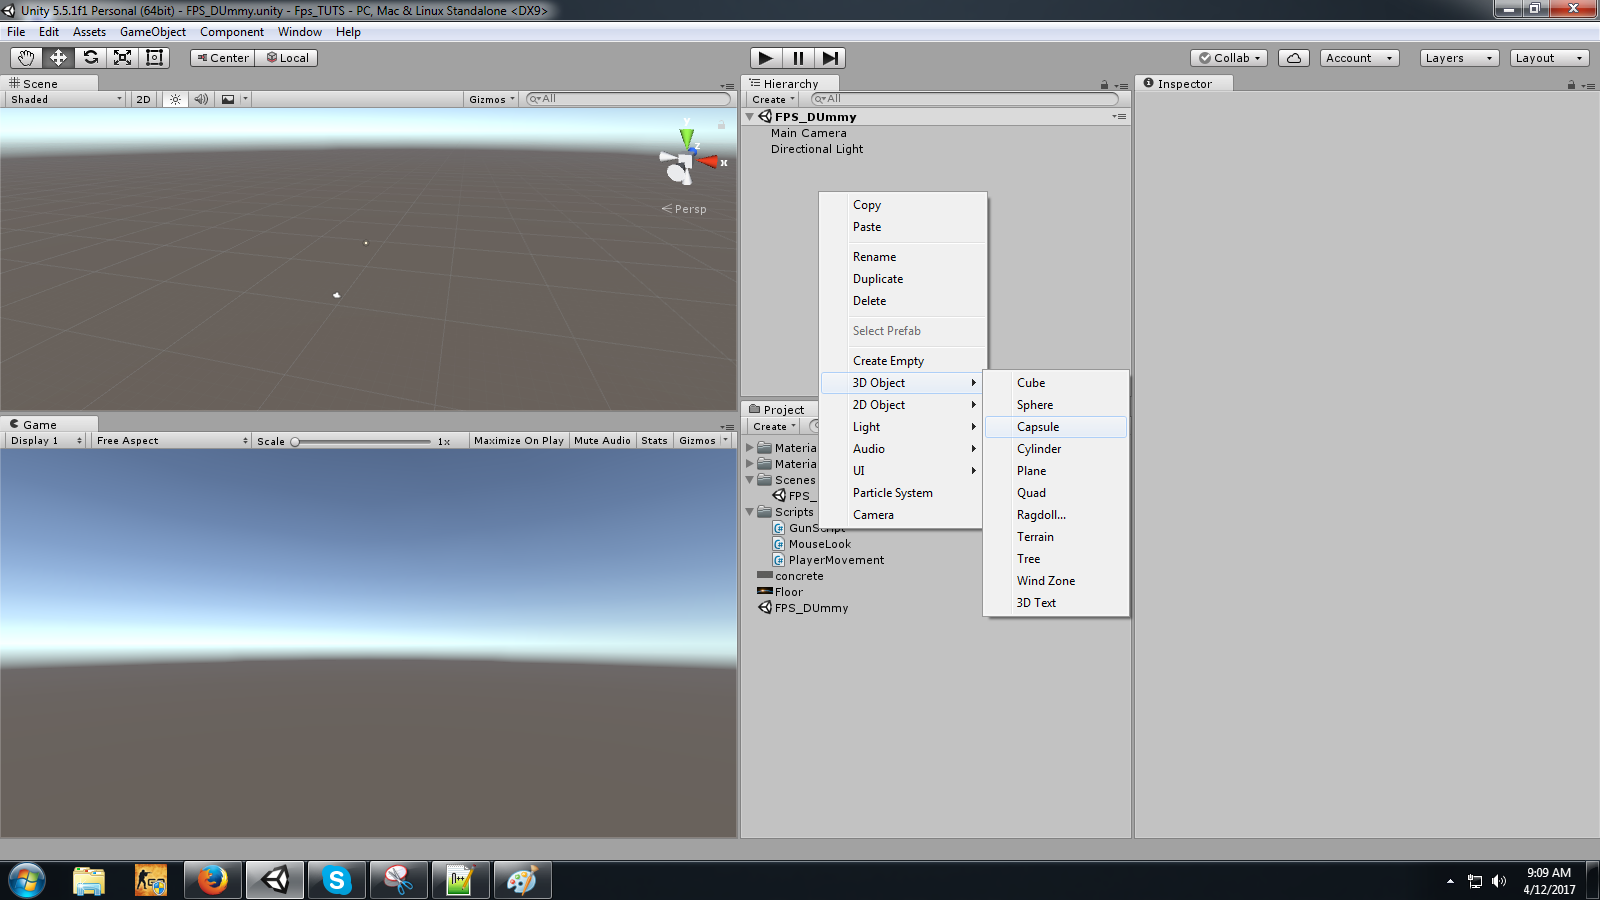
It’s time to create a player (Capsule). For this, you need to go to Hierarchy, as showed below. Right click on Hierarchy and choose 3D Object from the options. Doing so will bring more options, with the one called Capsule.
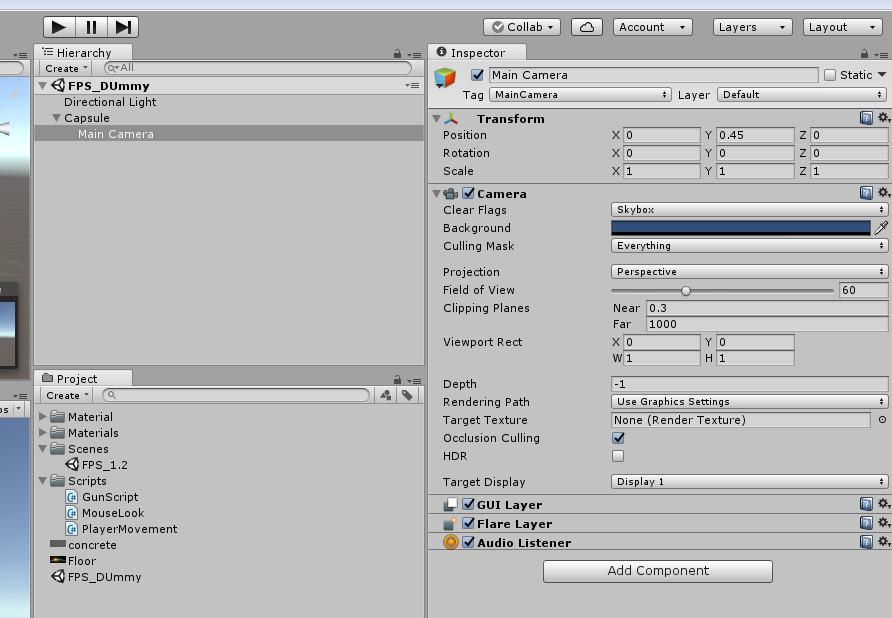
Click on Capsule and set the Capsule's transform in 'Inspector’ as showed below.

The next step is to make main camera child of player capsule and set its transform as showed below.
Now, we will add new script to the main camera and name it "MouseLook".
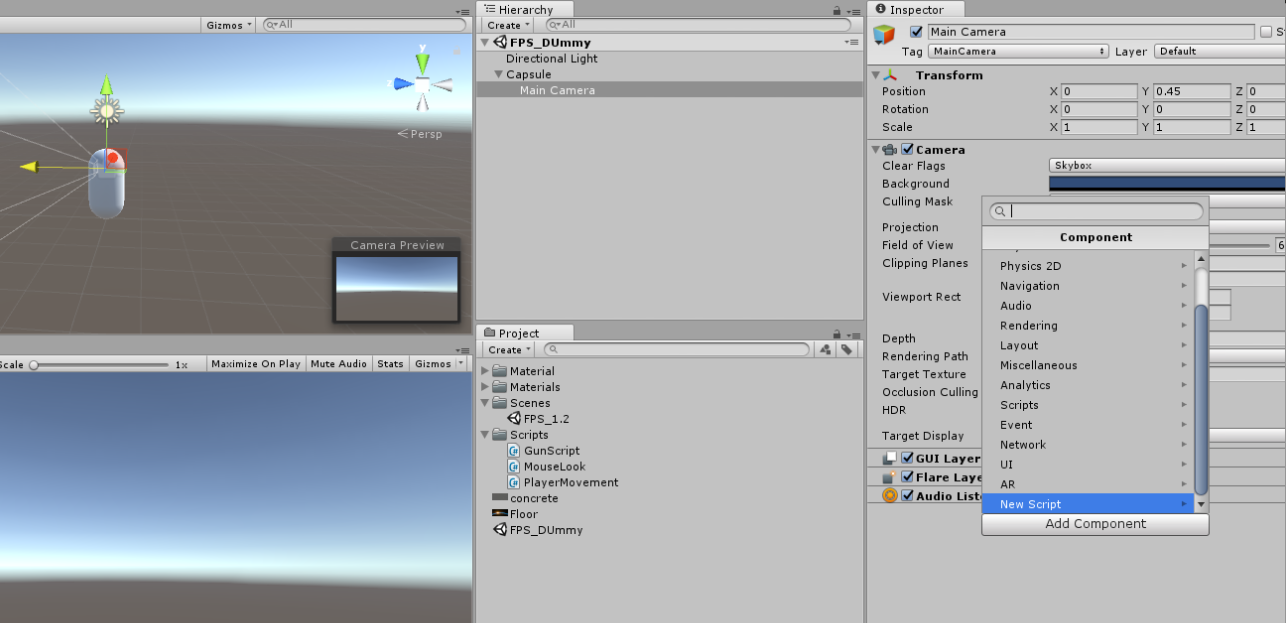
Check out the script below.

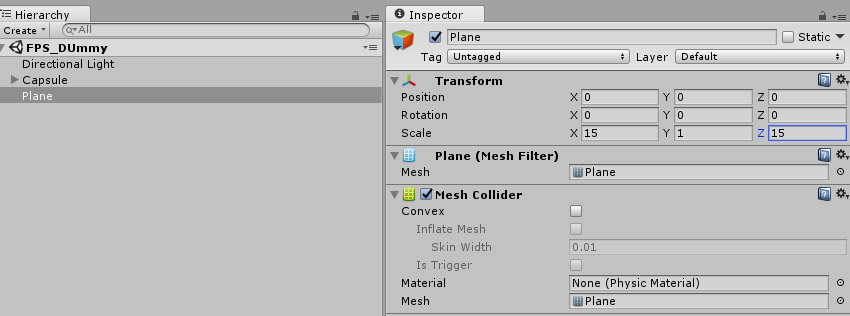
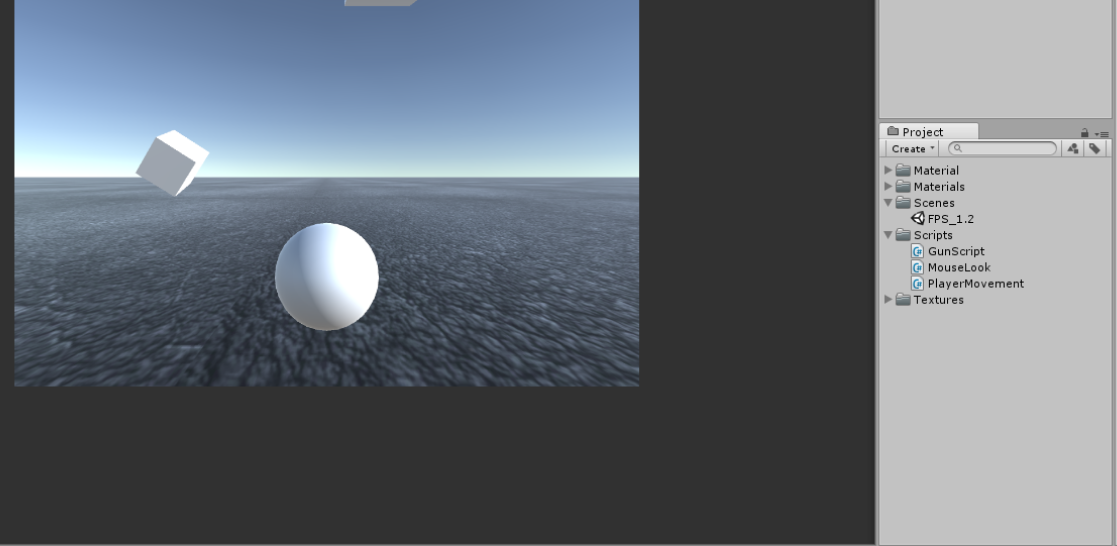
We can’t imagine our game without a ground. Therefore, we will add a Plane to the scene.
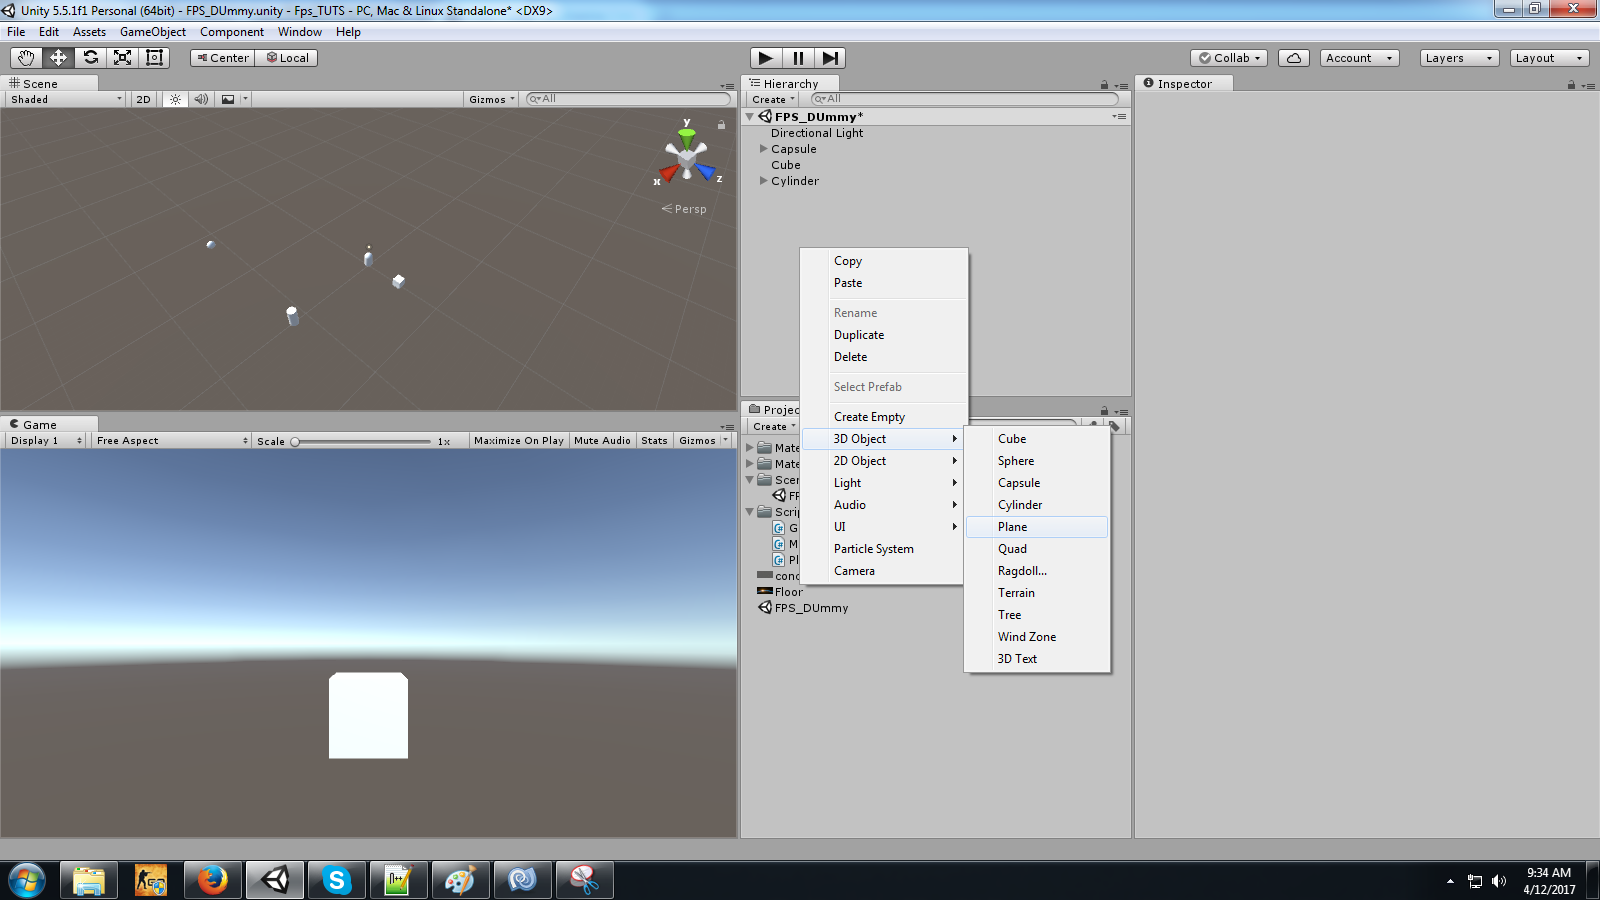
The next step is to scale the Plane to (15, 0, 0). And then, we need to add some cubes, sphere, and cylinder to our scene to make a level. We will place them randomly above the ground. If we run the game now, the player will look around.
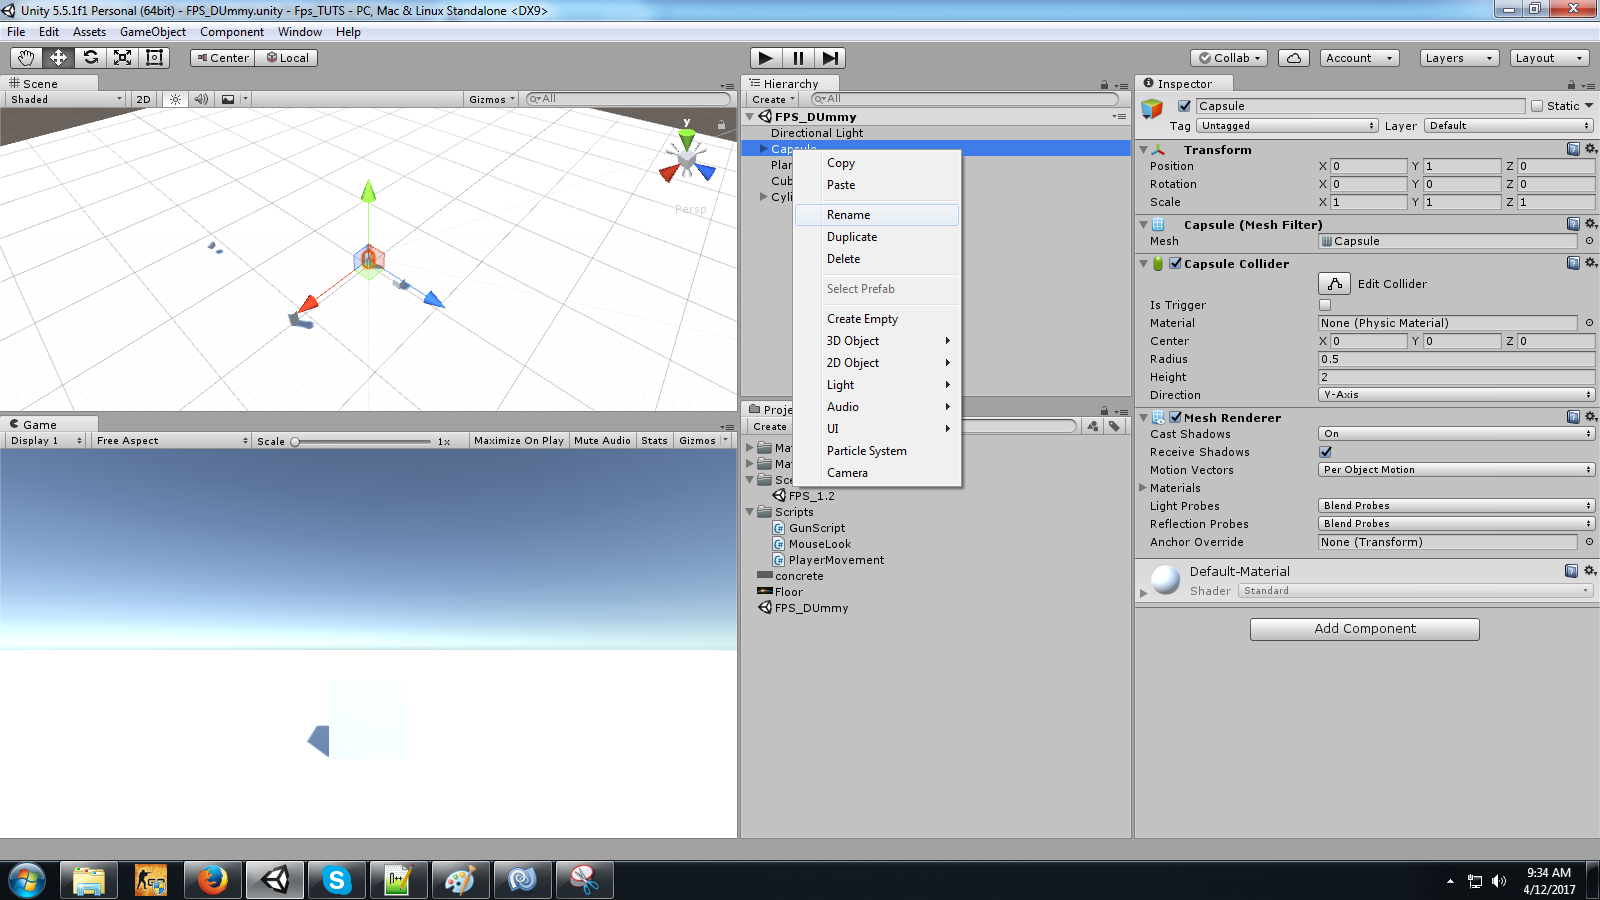
Rename Capsule to "Player Capsule".
Now, we will add new script to player capsule and name it "PlayerMovement". The script for player capsule is mentioned below.
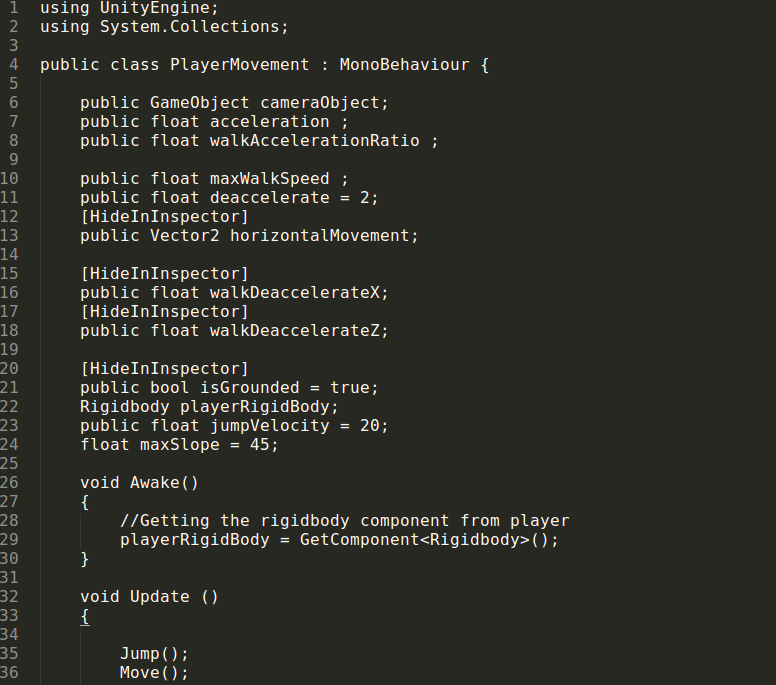
Continued…
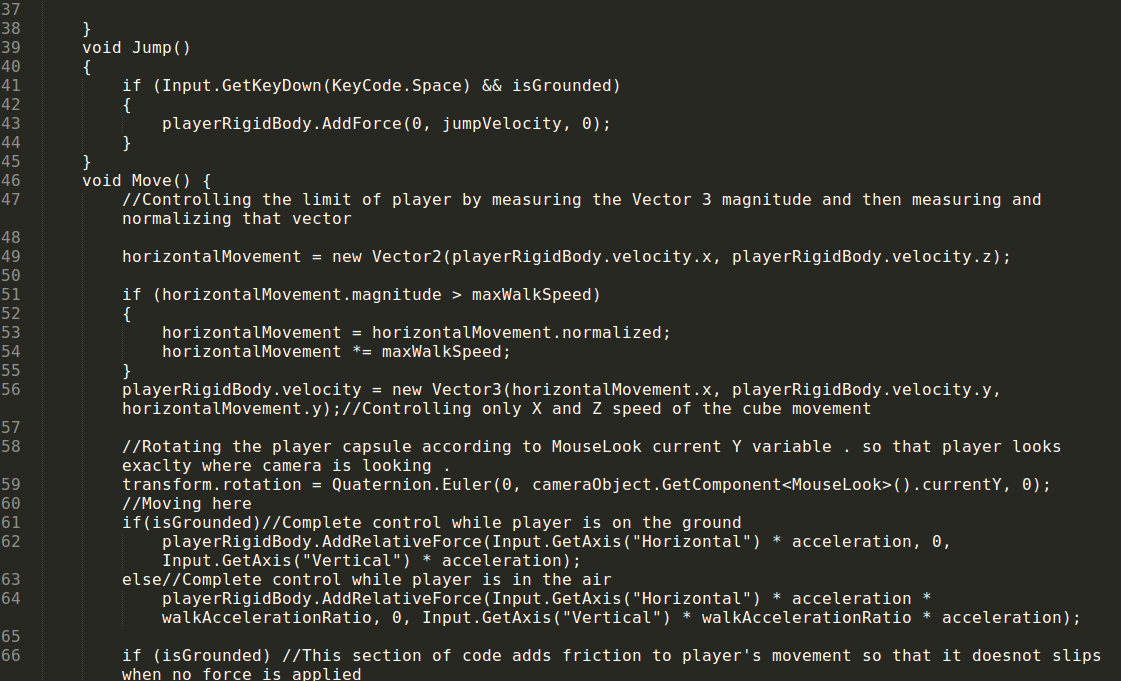
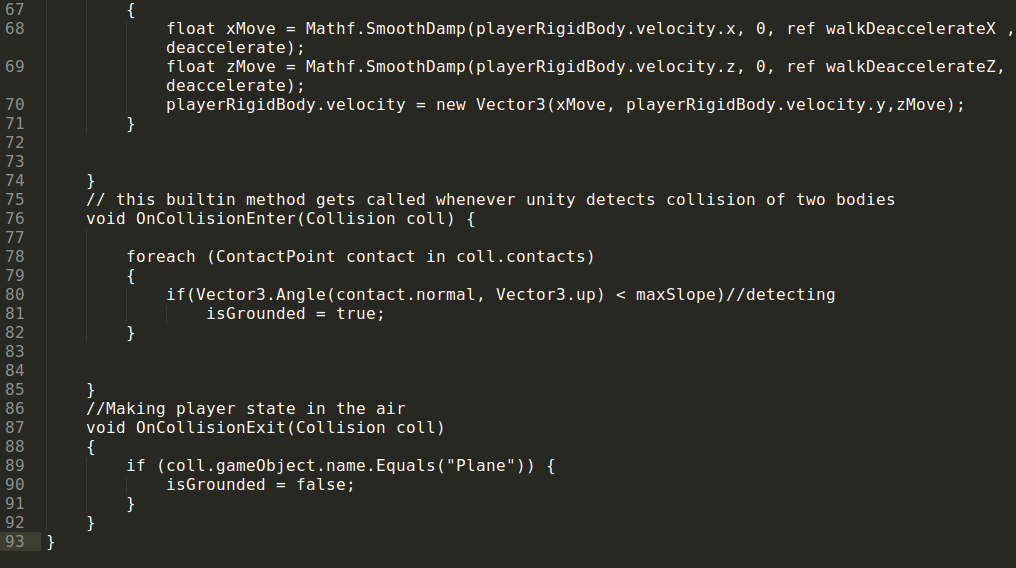
Continued…
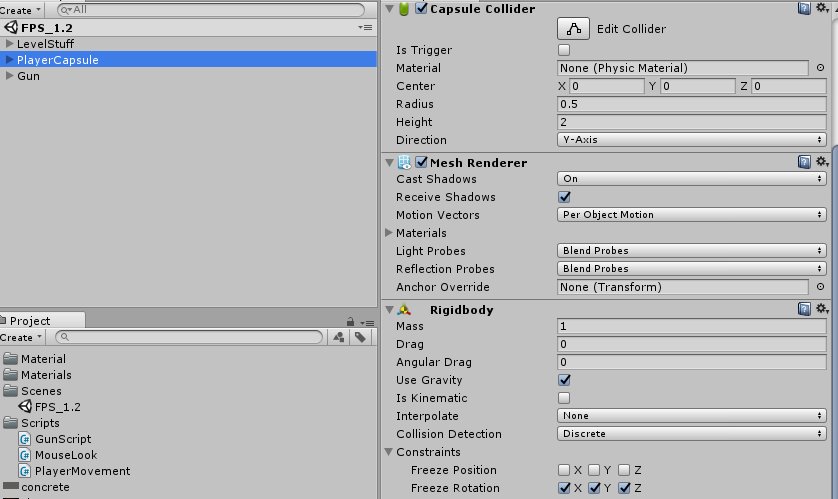
We want our GameObjects to act real when influenced by gravity or do something special under added forces. In order to make this happen, we need to add rigidbodies to our GameObjects. To add rigidbodies, we will first click on “Add Components” and then on “Physics” as showed below.
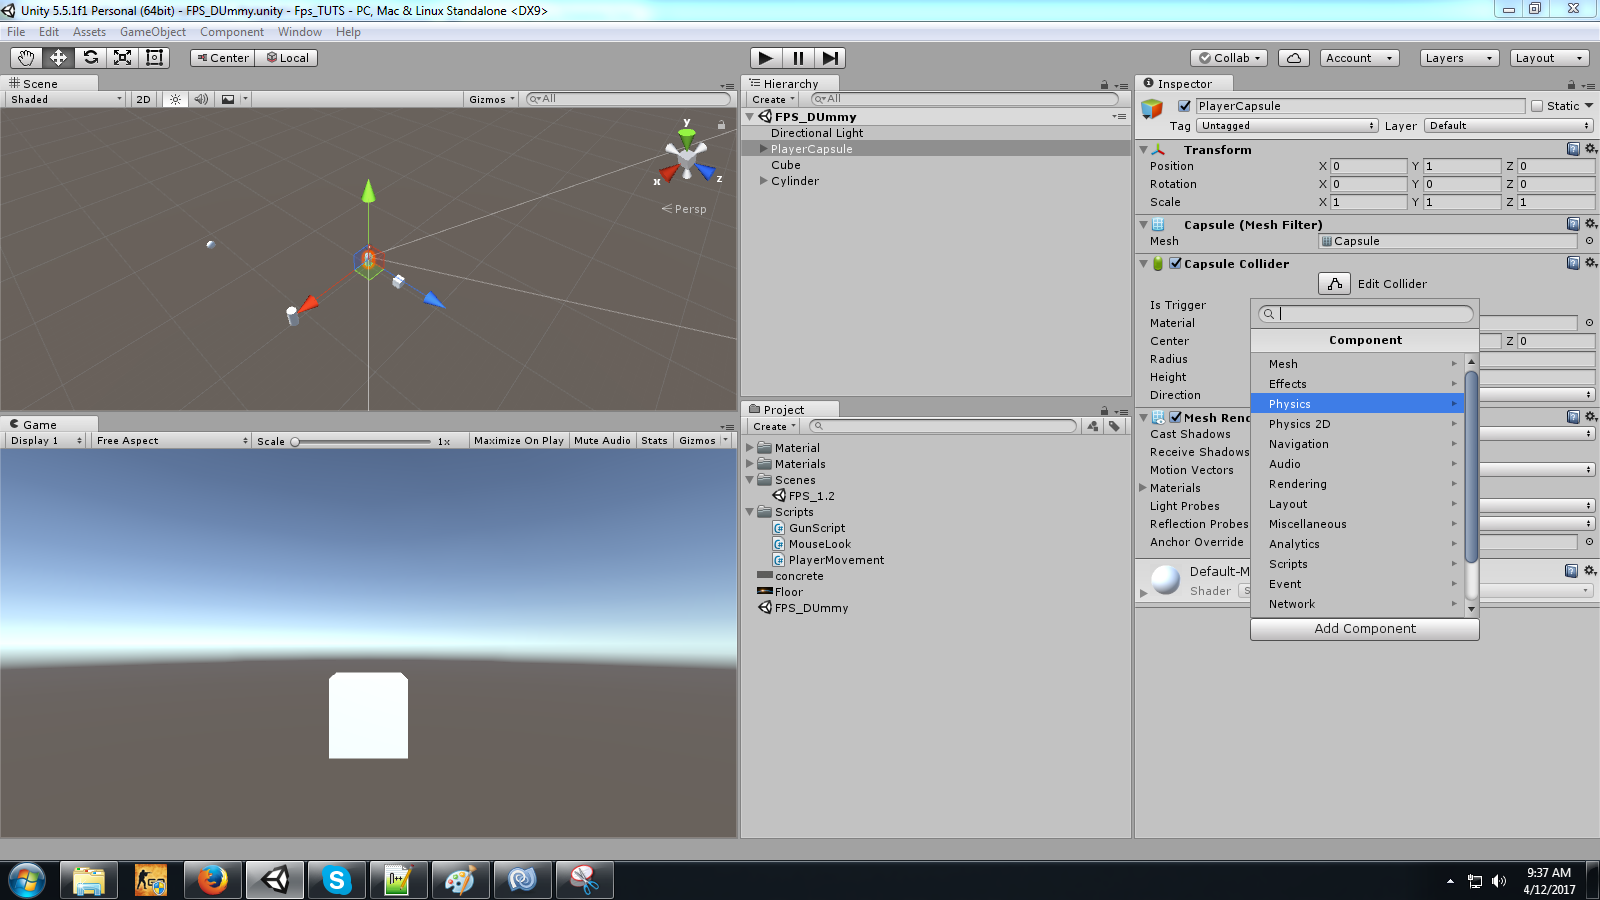
Clicking on Physics will bring us “RigidBody” with a few options as showed below (towards the bottom right). The next step is to set rigidbody constraints to ensure that player does not fall over on slight movements. Here, we are basically adding Physics to our GameObjects so that the game play appears real.
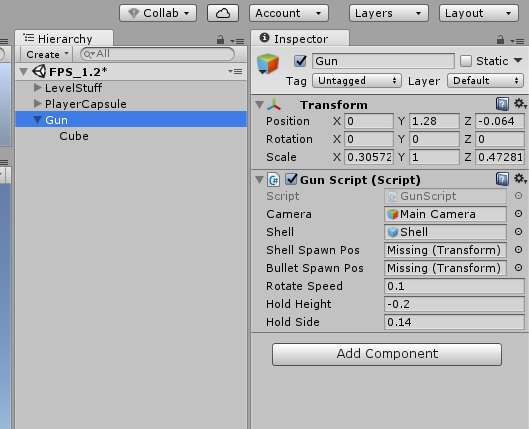
Our FPS can’t be complete without a gun. So now, we will be adding a gun in our game. Create an empty game object and name it "Gun".
The next step is to set its transform to given values.

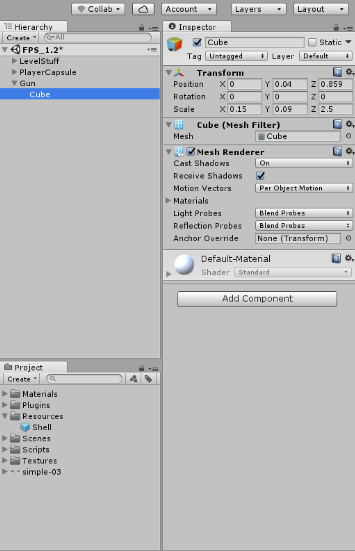
It’s time to create a nested cube to “Gun”. Right-click on “Gun” and select a 3D Cube. Now, set cube's transform to given values showed below.
Now, attach a GunScript on Gun gameObject. The code to be pasted into it is mentioned below.
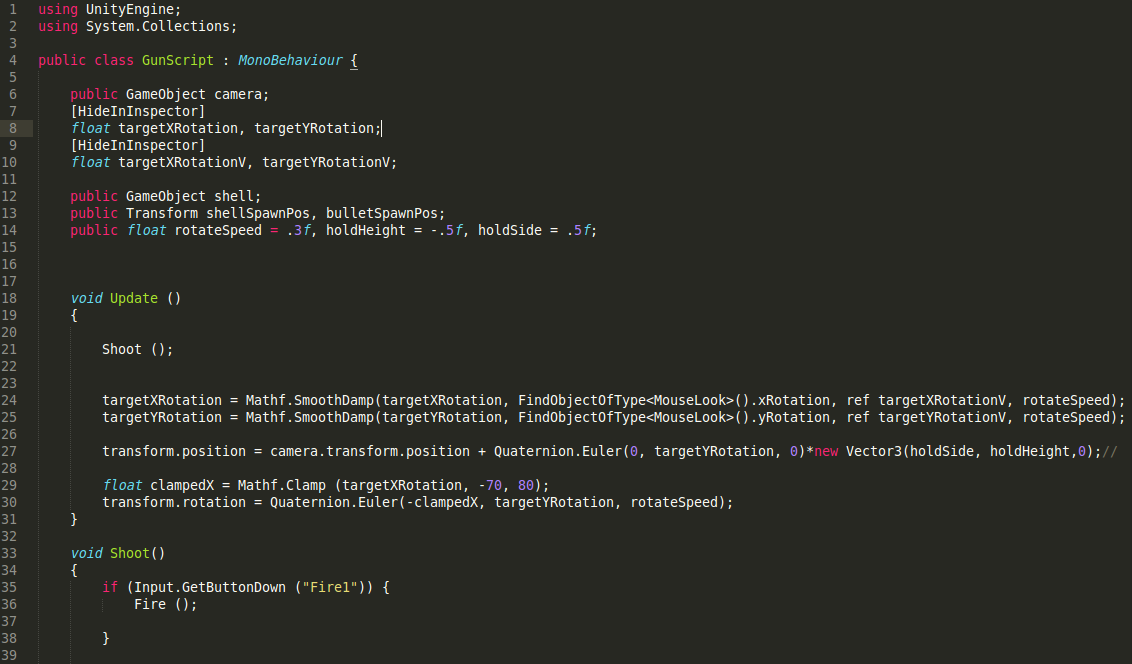
Continued...
Set the script variables to given values in the editor. For camera field drag-and-drop, select "MainCamera" which is child of "PlayerCapsule" GameObject.
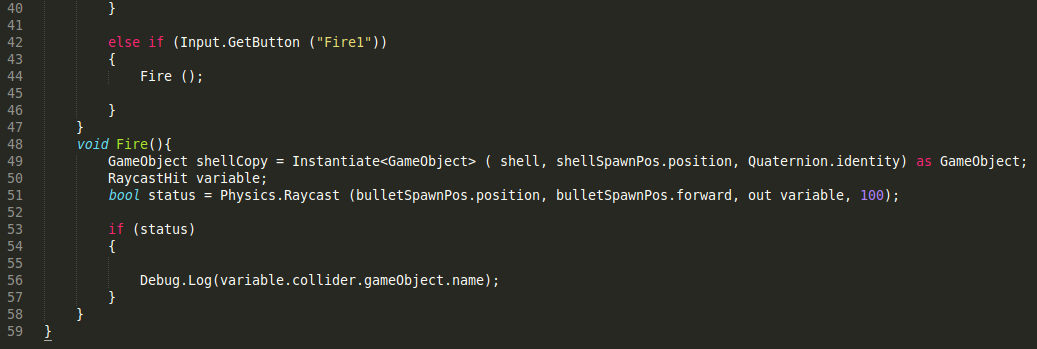
No gun in any FPS game in this world is of any use until it shoots. Having said that, we will now create and add a script to make sure the gun fires whenever triggered.
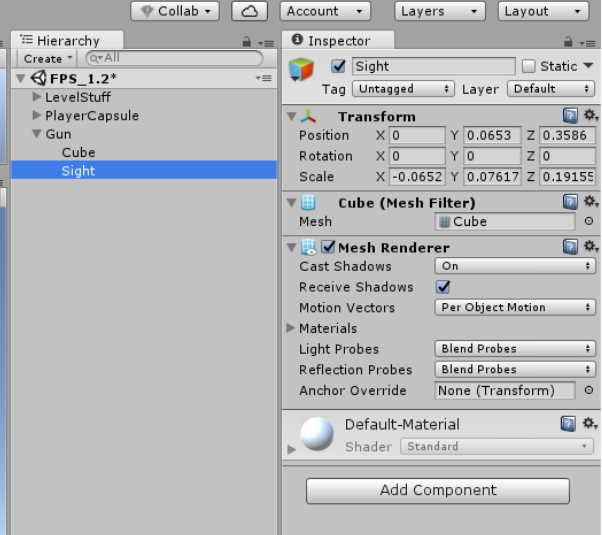
To start, we will first add a new cube to the Gun object and name it Sight (Optional). We will set values as showed below to ensure the gun looks how a gun looks like.
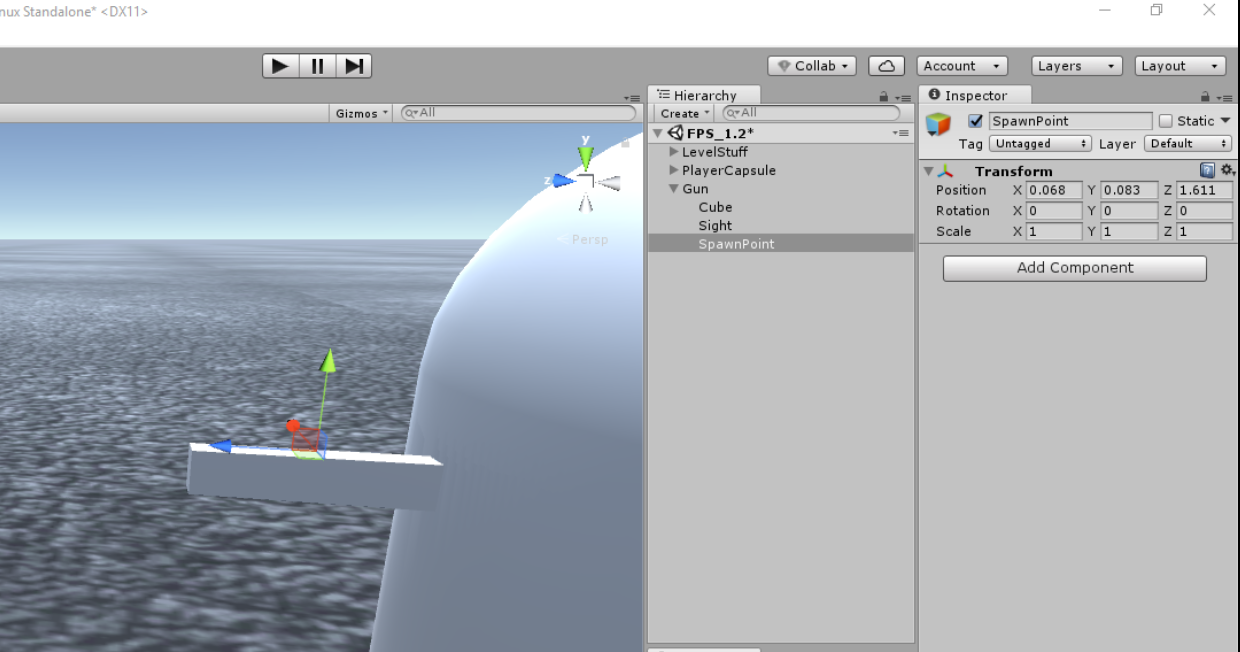
The next step is to add an empty game object to Gun and name it "SpawnPoint". This object's position will work as a generation point for the shells of bullet when firing. The variables are showed below.
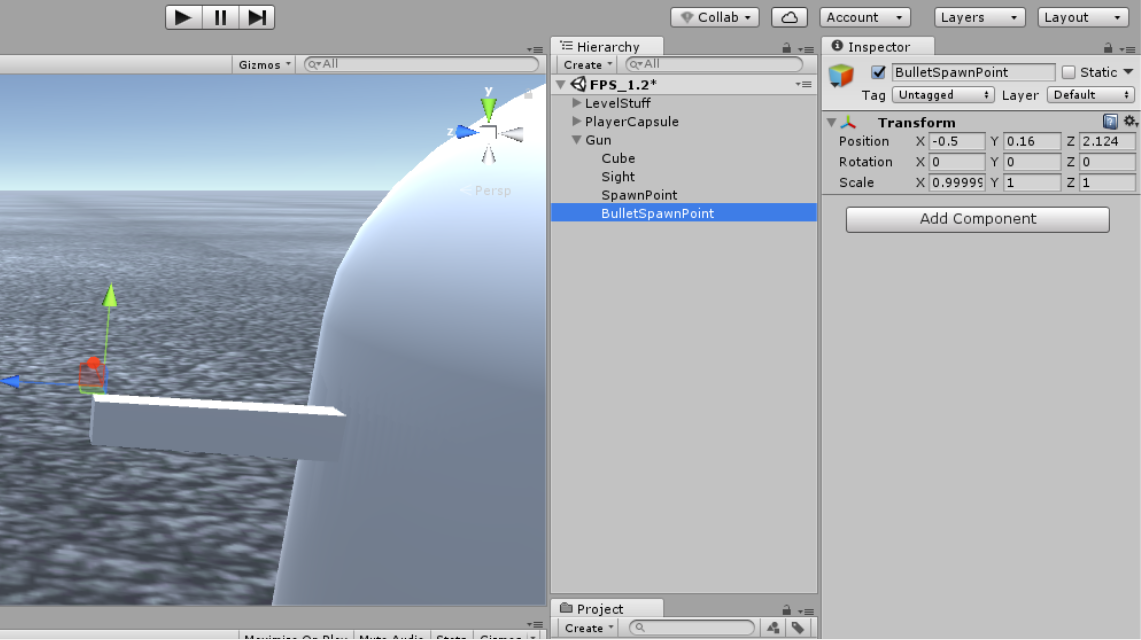
We are now going to add another empty game object to Gun and name it BulletSpawnPoint. This object's position will work as a point from where we will simulate bullet shooting via "Raycasting”. The variables are showed below.
Now, assign both "SpawnPoint" and "BulletSpawnPoint" to GunScript's variables "ShellSpawnPos" and "BulletSpawnPos". In order to help players aim at targets, we need to add the crosshair in our gun. You can download any crosshair of your choice in PNG format from the internet.
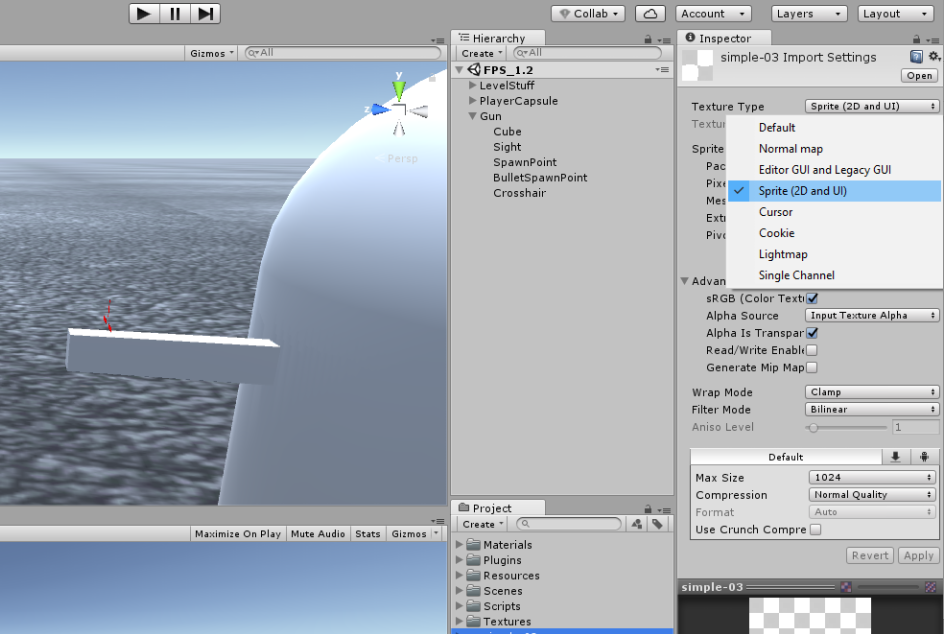
The next step is to create a 2D sprite in Gun object and name it "Crosshair" and assign it to the downloaded "sprite”.
Note: When importing the image in PNG make sure to switch image mode to sprite as showed below.
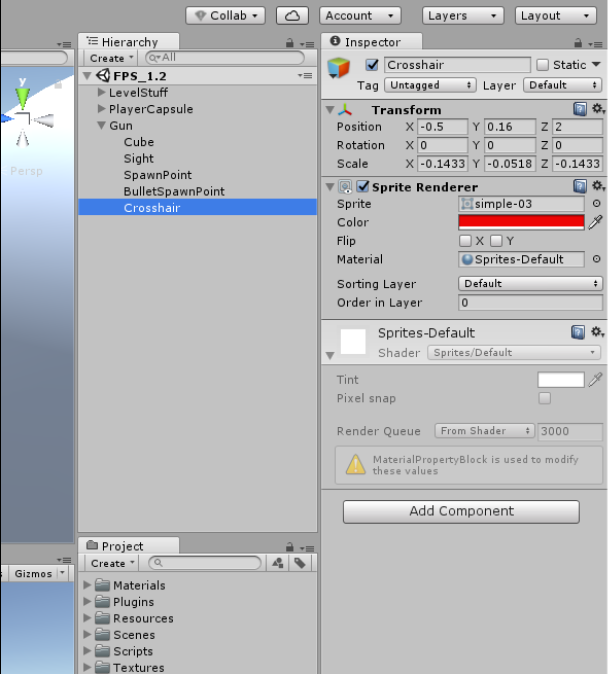
Moving forward, we need to set the Crosshair values as showed below.
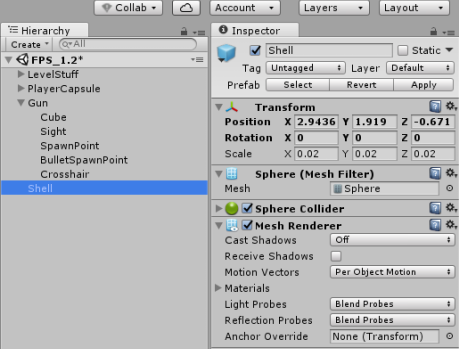
Now, we will create “Shell”, for which we will create a sphere and name it “Shell”.
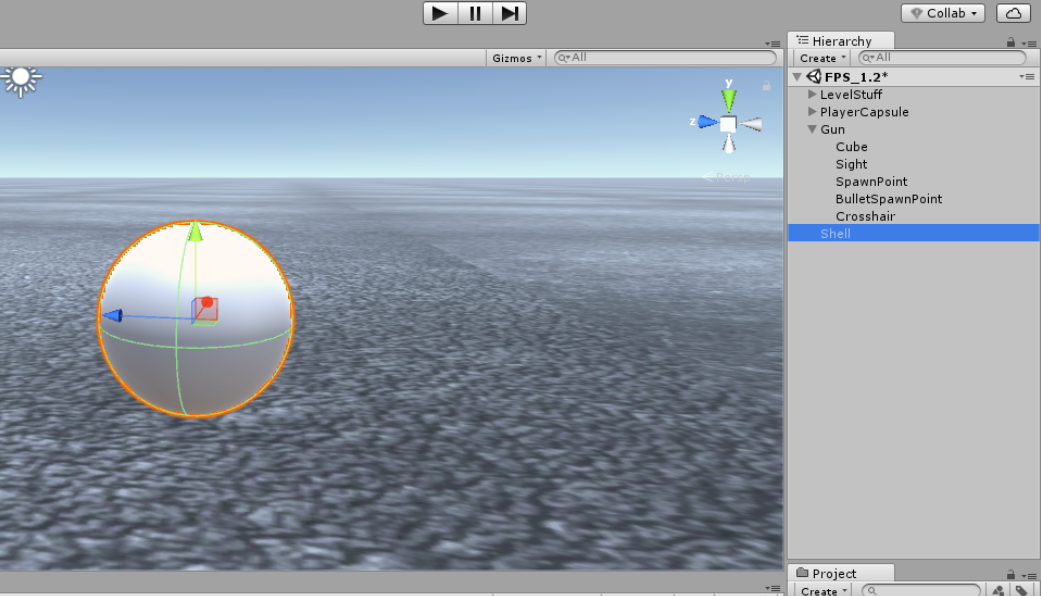
We will also set the Shell as showed below.
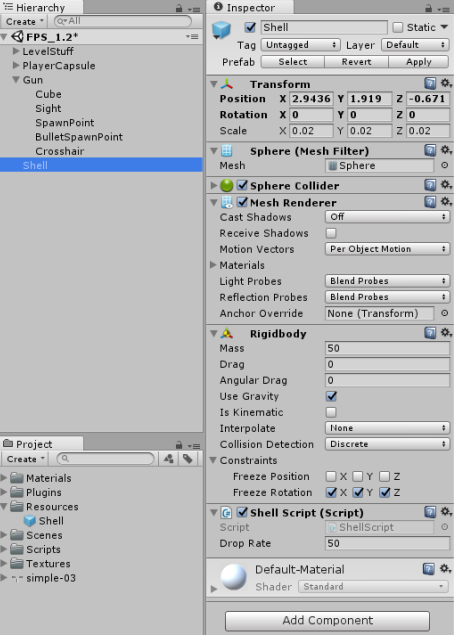
Now, add Rigidbody and ShellScript to the Shell, and set both component's values as showed below.
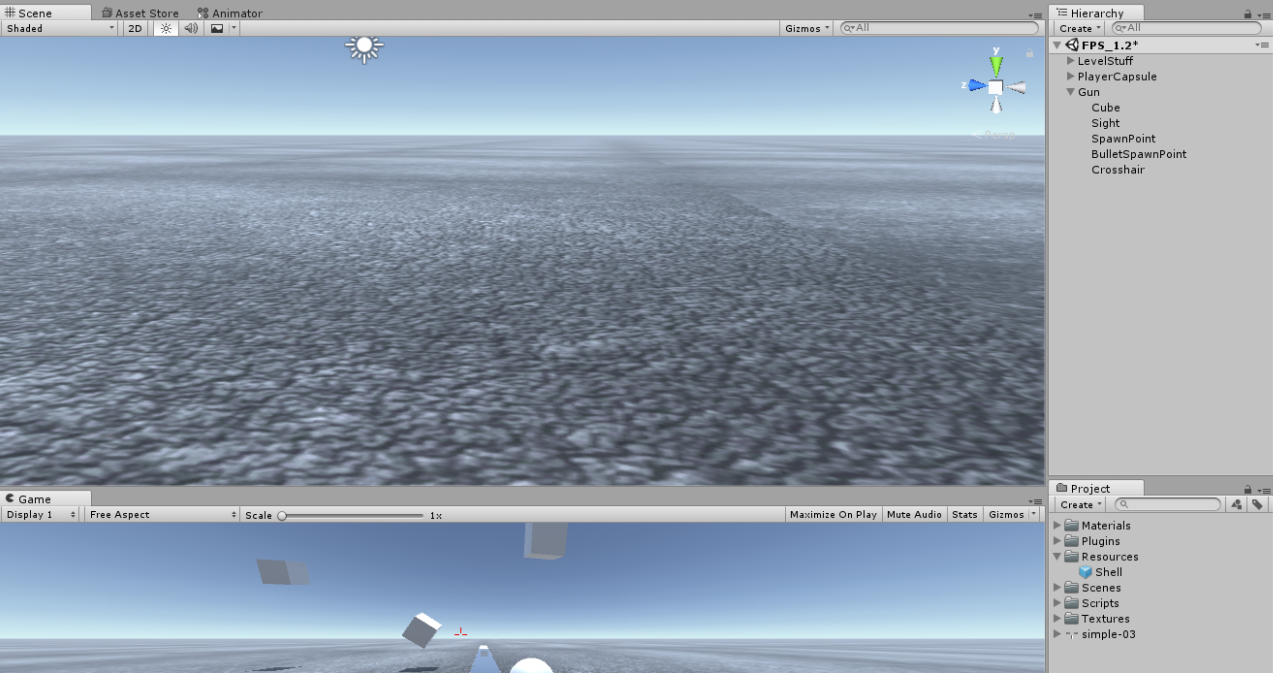
It’s time to create a folder in Project view and name it "Resources". Now drag n drop Shell GameObject from Hierarchy to Resources folder. We will now delete the shell from hierarchy. The final editor will look like as shown below.
That’s it! We have covered all the step to make our FPS game ready. How did you find it? Wasn’t it easy to create your first FPS game using Unity? I am sure it was. However, if you still have any query or not being able to understand anything in the tutorial, feel free share your concerns in the comment box below.