Get a Quote
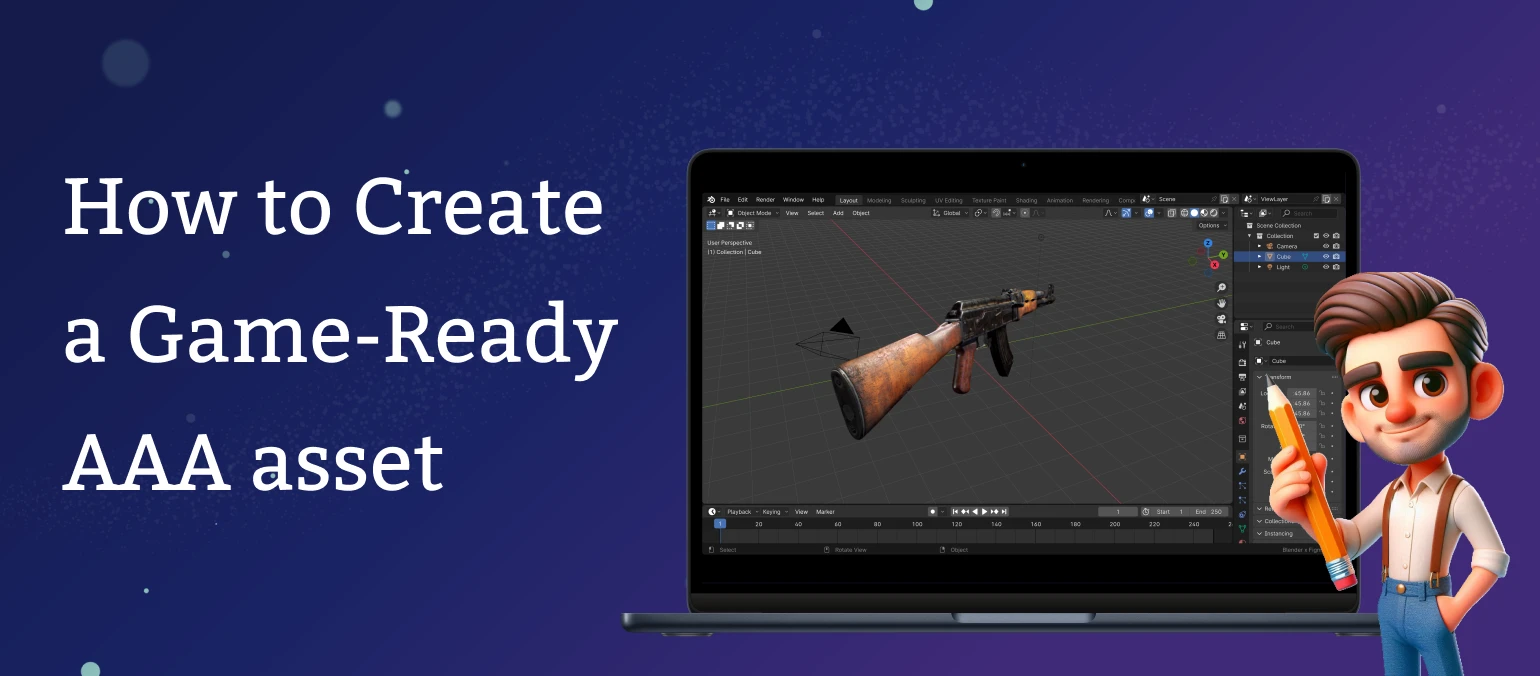
Introduction
My name is Kailash Khanduri and I am a 3D Artist. For the last 12 years, I have worked and experimented with various tools for creating true-to-life 3D models. It has been a journey of studying, understanding and constantly practicing to create something that can be seen as ‘real’.
I have always been fond of guns as a child. At Logic Simplified, a leading game development company, we created an FPS game Mr. 45. Even though an AK-47 was not used as an asset, I got the opportunity to test my skill and indulge in my passion.
This is the workflow for creating a AAA model of an AK-47, using Maya, Substance Designer, Substance Painter and Marmoset.
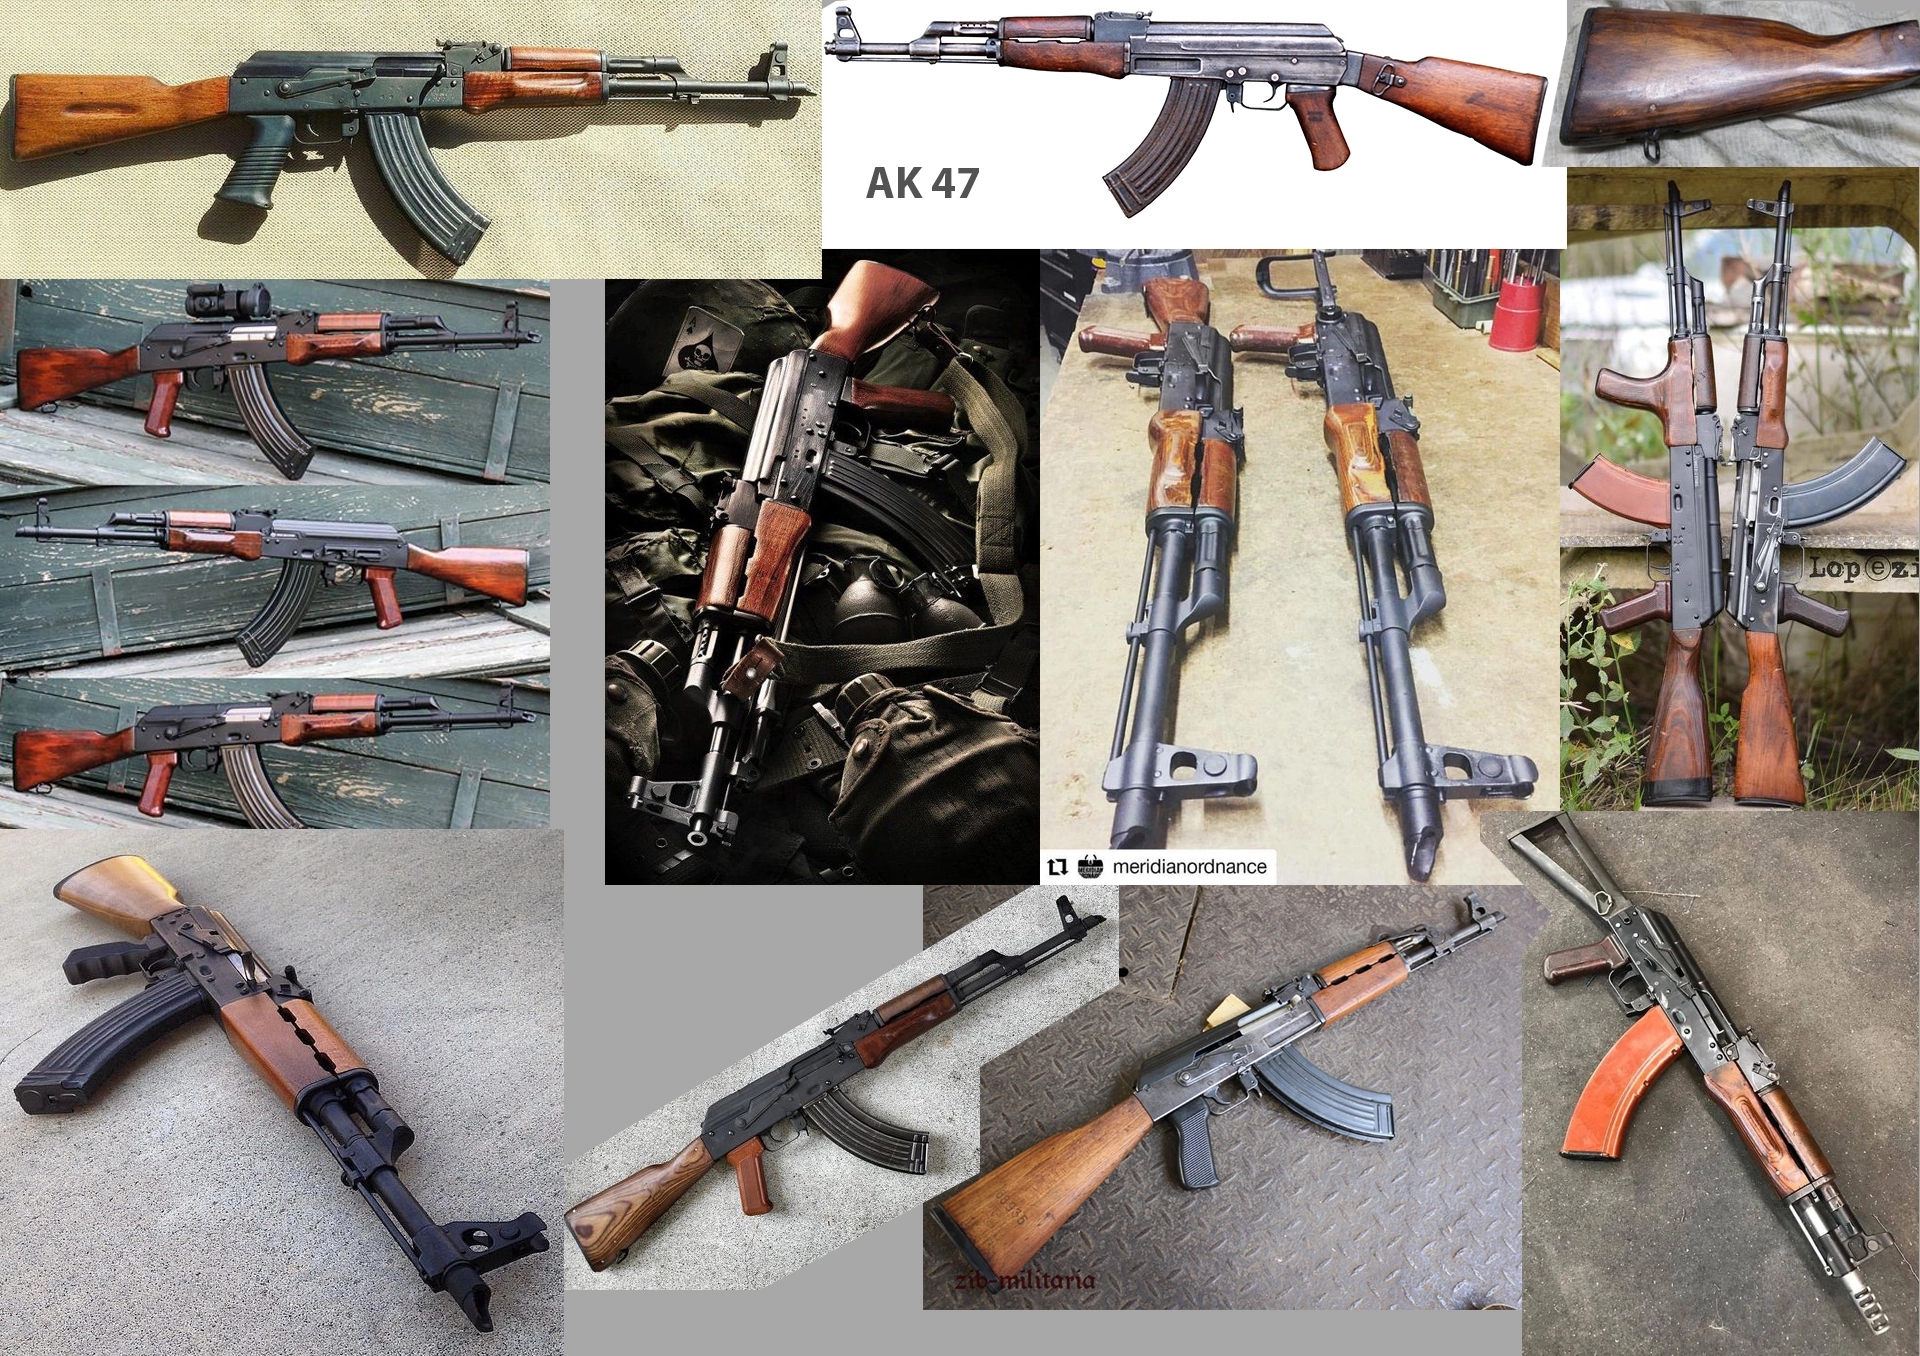
Collecting reference images
I believe that before any good asset is created, its image is already imprinted in the mind. Even before I began looking for reference images for the AK-47, I was certain about two things and thus I ended up giving myself two challenges:
- I wanted to make a used gun. A gun which had been in human contact for years, actually! This was the first challenge. Unlike a new object, a used object has marks of wear and tear on it. Different materials get worn out in different patterns. Convince the viewer of its ‘reality’ was going to be tough.
- Secondly, I wanted to create all materials from scratch so that I could control everything and get the output I wanted. For this, I thoroughly learned Substance Designer and Substance Painter.
I collected reference images from Google. Remember to gather enough references before you start modeling. The more you have, the better it is!
Building the 3D model
I used Maya for modeling. Maya is considered the better choice when you are trying to create more complex art. Seasoned gaming studios like ours love Maya for its features and flexibility. Another option is Blender but the tool kit in it is limited and the interface is not as convenient as Maya’s. Maya is also more effective for animations. Hence, it was my tool of choice.
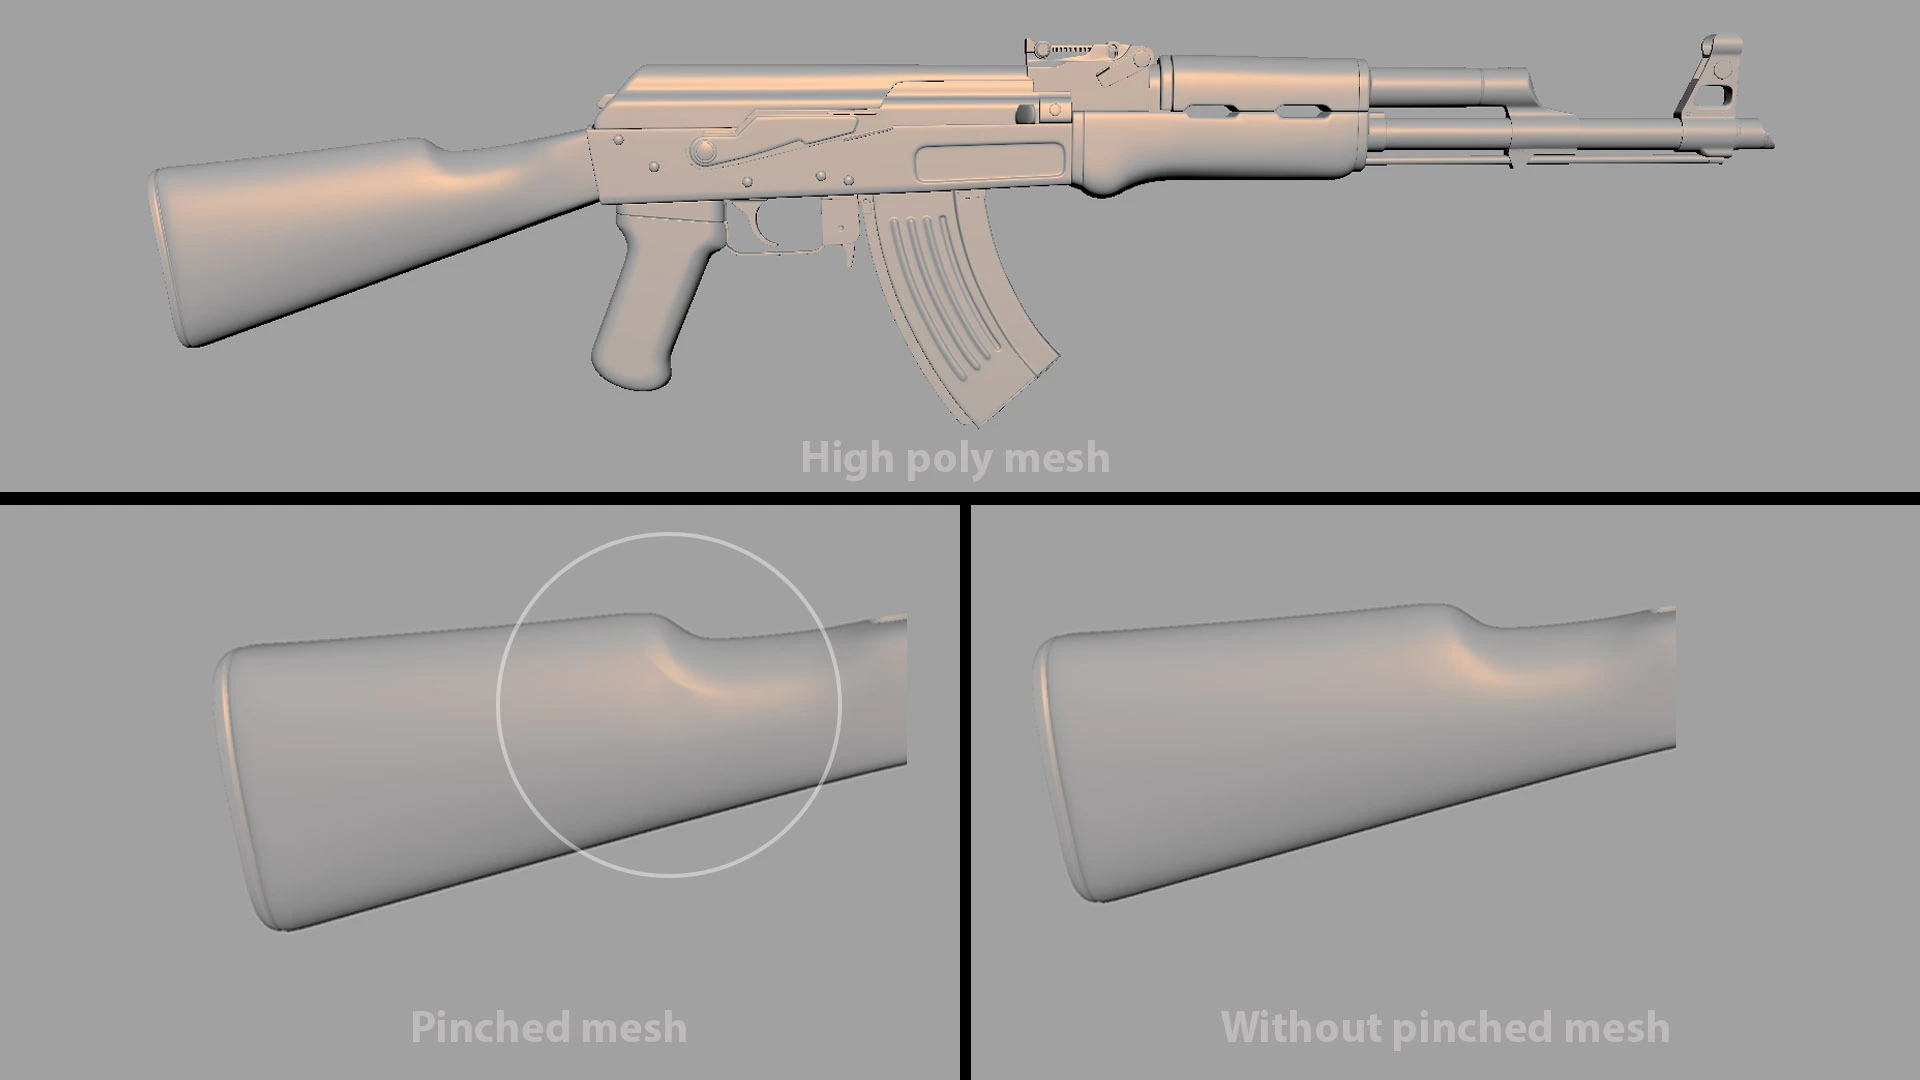
When creating the model, extreme care has to be taken that it does not get pinched anywhere. This is also a stage where you should not rush in order to get a perfect mesh flow. Primary shapes are as important as the secondary and tertiary forms. I believe forms first - details last.
I used a Blinn Shader on the asset to spot any issues with the mesh. If you’re looking for perfection, then this is the stage for it.
Blinn Shader helped me see highlights produced due to light shining off the surface at low angles. The gun has metallic surfaces and I wanted that successfully simulated.
A high poly mesh model of the gun came into being. This is a very exciting stage in 3D modeling because the hyper-detailing of the high poly model makes you see the asset very realistically. If it matches your mental image of the asset, then even better!
Next, I split the high poly model into two colors - red and blue - for the ID map, covering different elements of the mesh with different colours. With that I have to create a low poly model of the gun on which we will bake the high poly details.
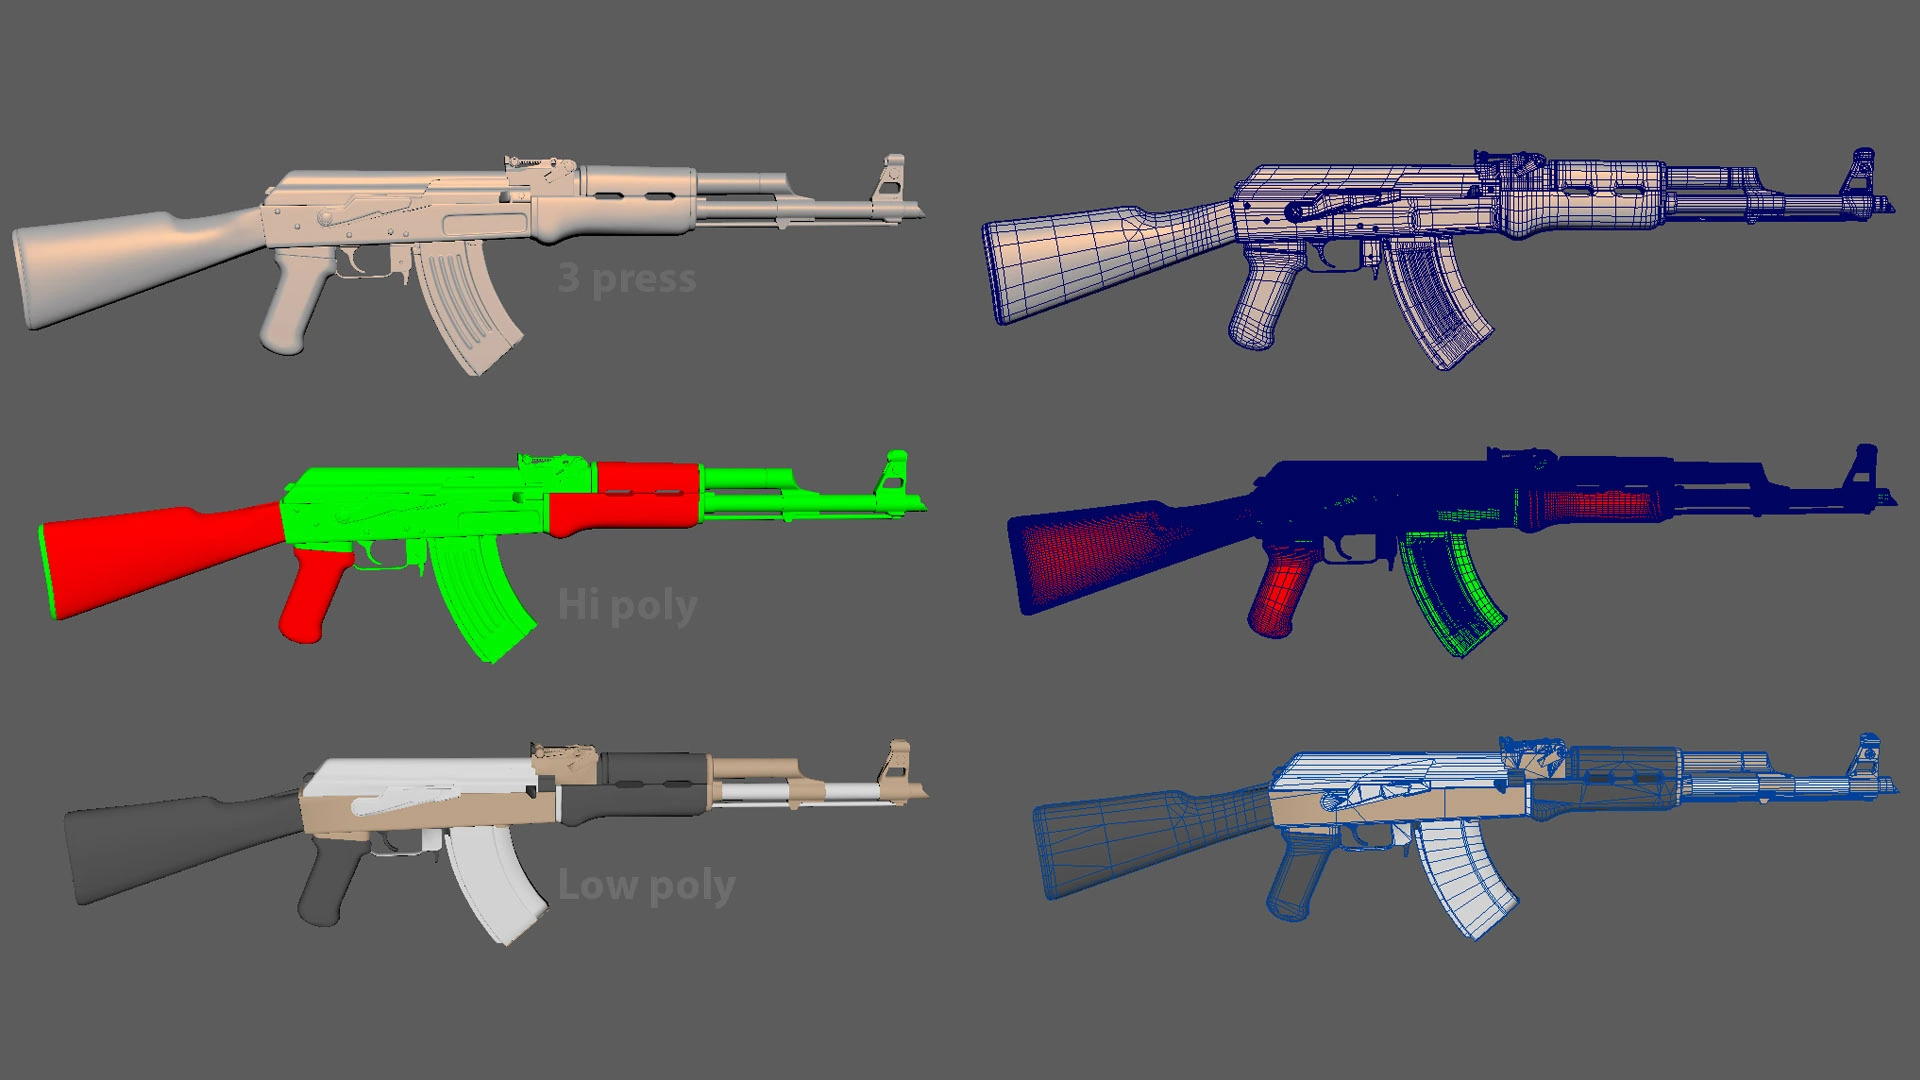
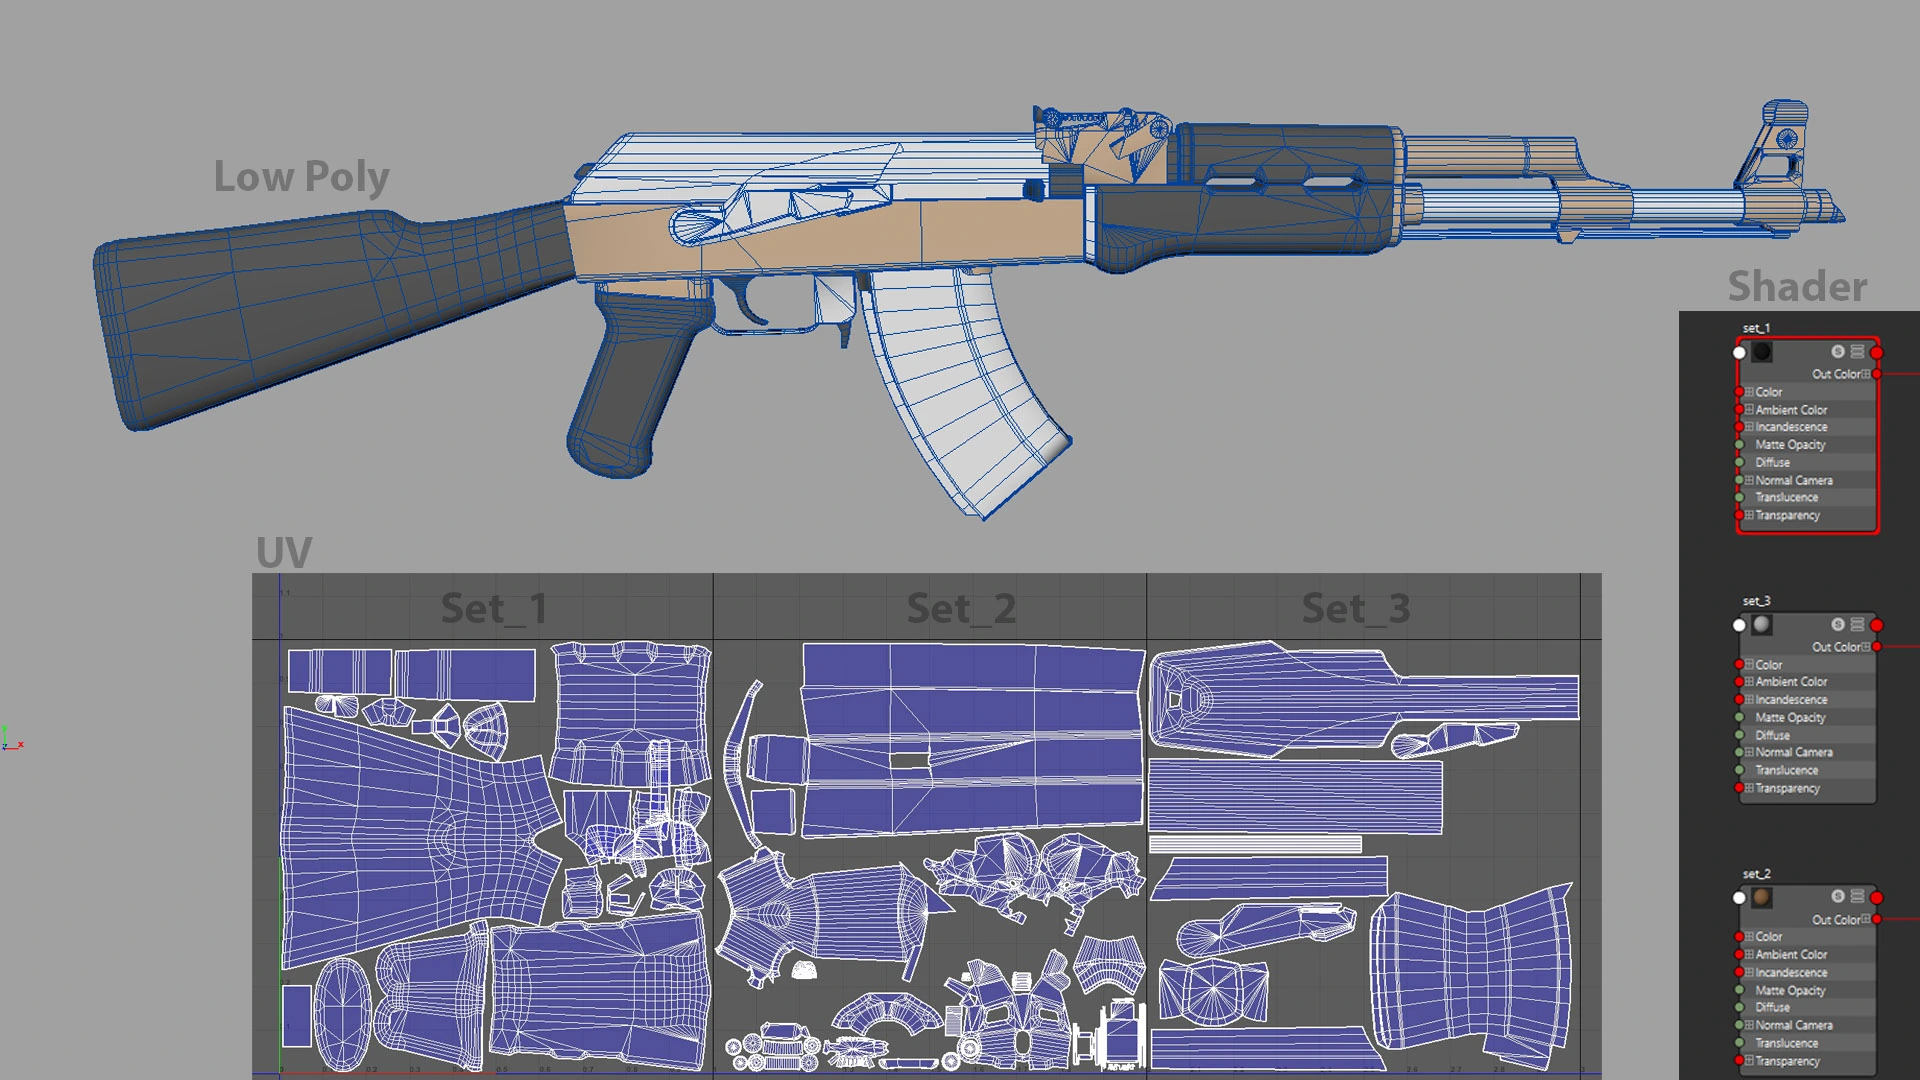
Then I unwrapped the low poly mesh model into three UV sets in order to get a good resolution of the textures. For real-time applications like games, low poly models are used. UV sets are the coordinates that map the 2D texture images onto the 3D model surface. They define how the texture wraps around the model. Texture layers are the different images that are applied to the model using the UV sets.
Baking (Transfer high poly details in low poly model)
The next step is extremely important. We have to properly bake the high poly mesh details into the low poly mesh. I used Substance Painter for this. You have to try to cover the high poly mesh properly within the cage. The low poly asset must also be properly synchronized on the high poly asset.
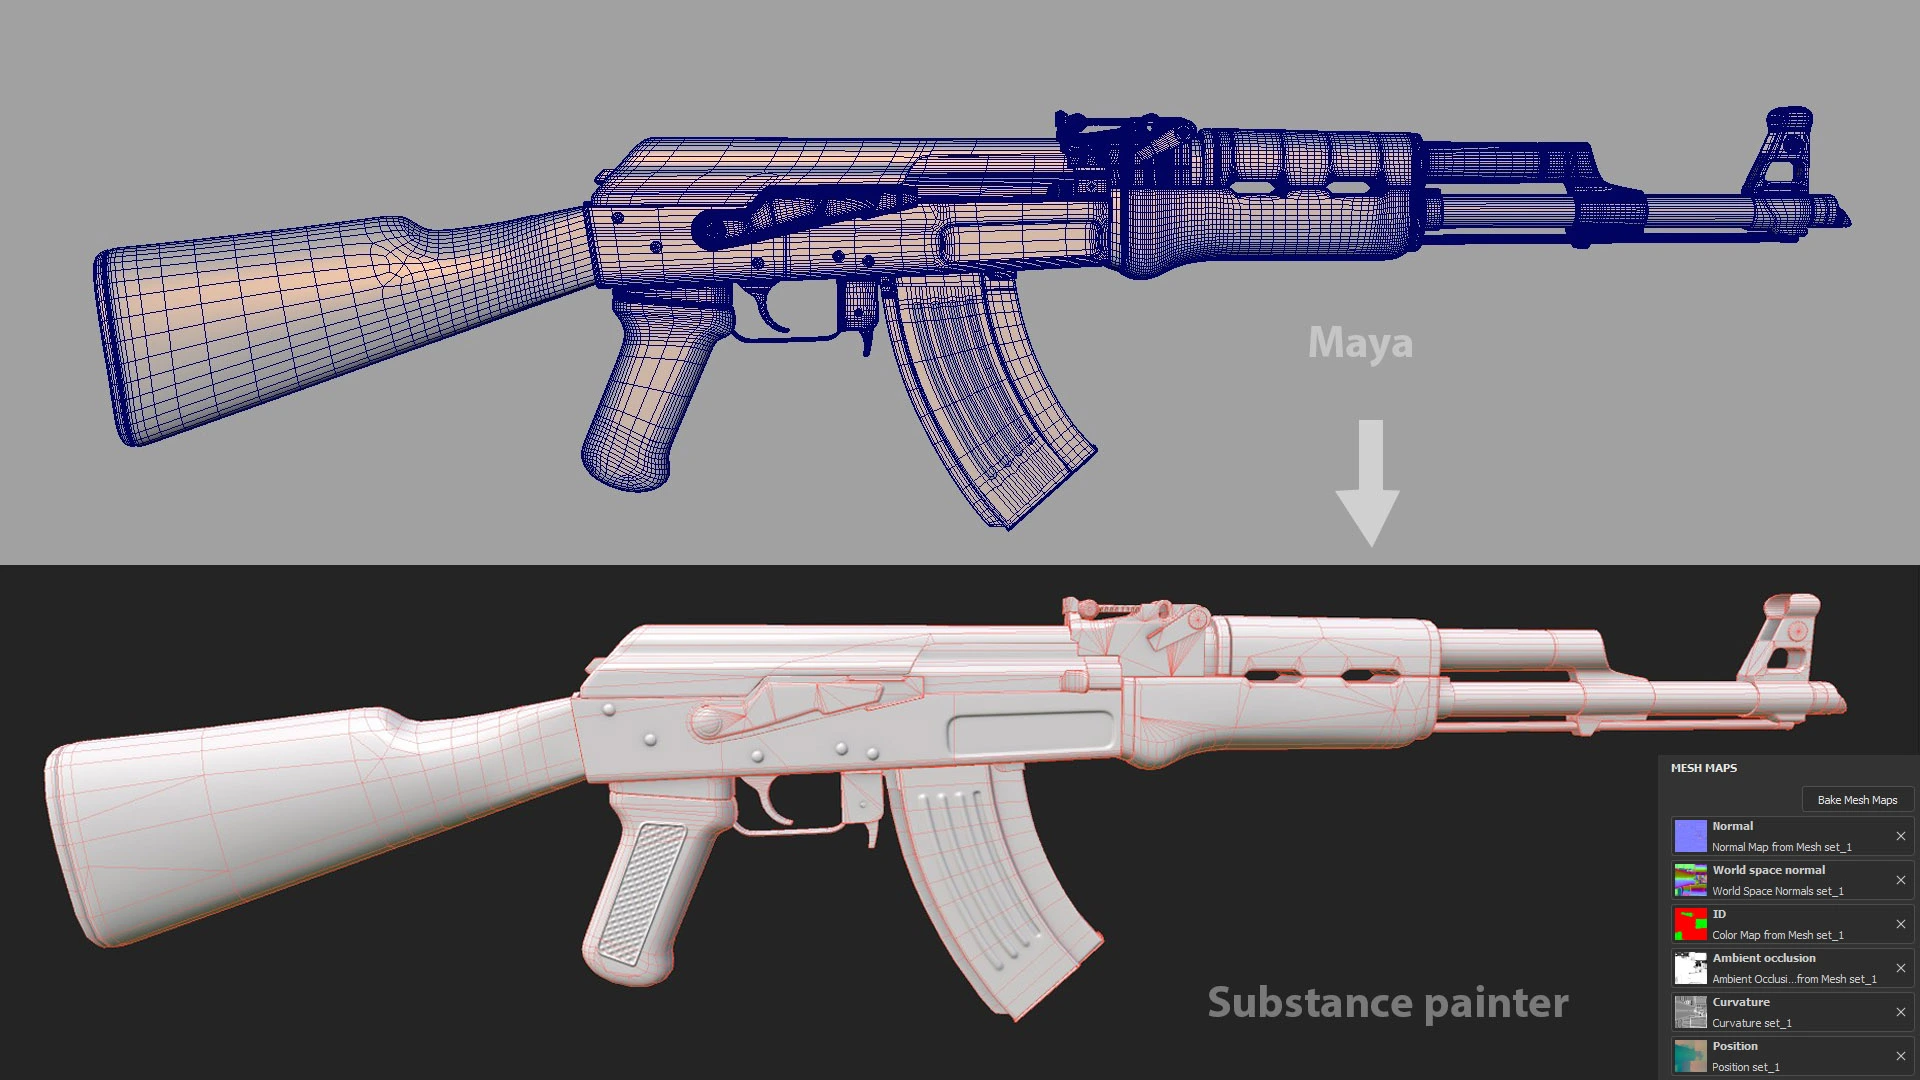
I would recommend using floating geometry on the high poly model. Floating geometry efficiently creates a high level of detail on an object without needing to cut into it several times, and this avoids the creation of too complex a mesh.
Would you like to know more? Get a free 20-min consultation.

Wood and metal PBR material design
It was time to create some materials now, mainly wood and metal for the gun, and I was bent on not using any pre-made wood material or image. I wanted to understand PBR textures well. I had to thoroughly learn Substance Designer. Substance Designer creates complex textures, which we call materials, and Substance Painter applies those materials to the model itself.
A 3D game designer, or anyone in the creative field for that matter, never stops learning. And if you like what you do, even challenges seem exciting. However, if you ask me at which stage I sweated the most, it was now.
At this point it was as if a gun was truly pointing on my head, asking to be made to perfection. ‘From scratch, Kailash! From scratch!’ is the voice I kept hearing in my head.
Creating a material in Substance Designer was a mind-boggling task right from the beginning. This software is node-based and I kept thinking that it would have been easier to create it in Photoshop, my tool of choice before moving to Substance Designer. But remember what I told you right at the start? I wanted to control everything and I could do so with Substance Painter.
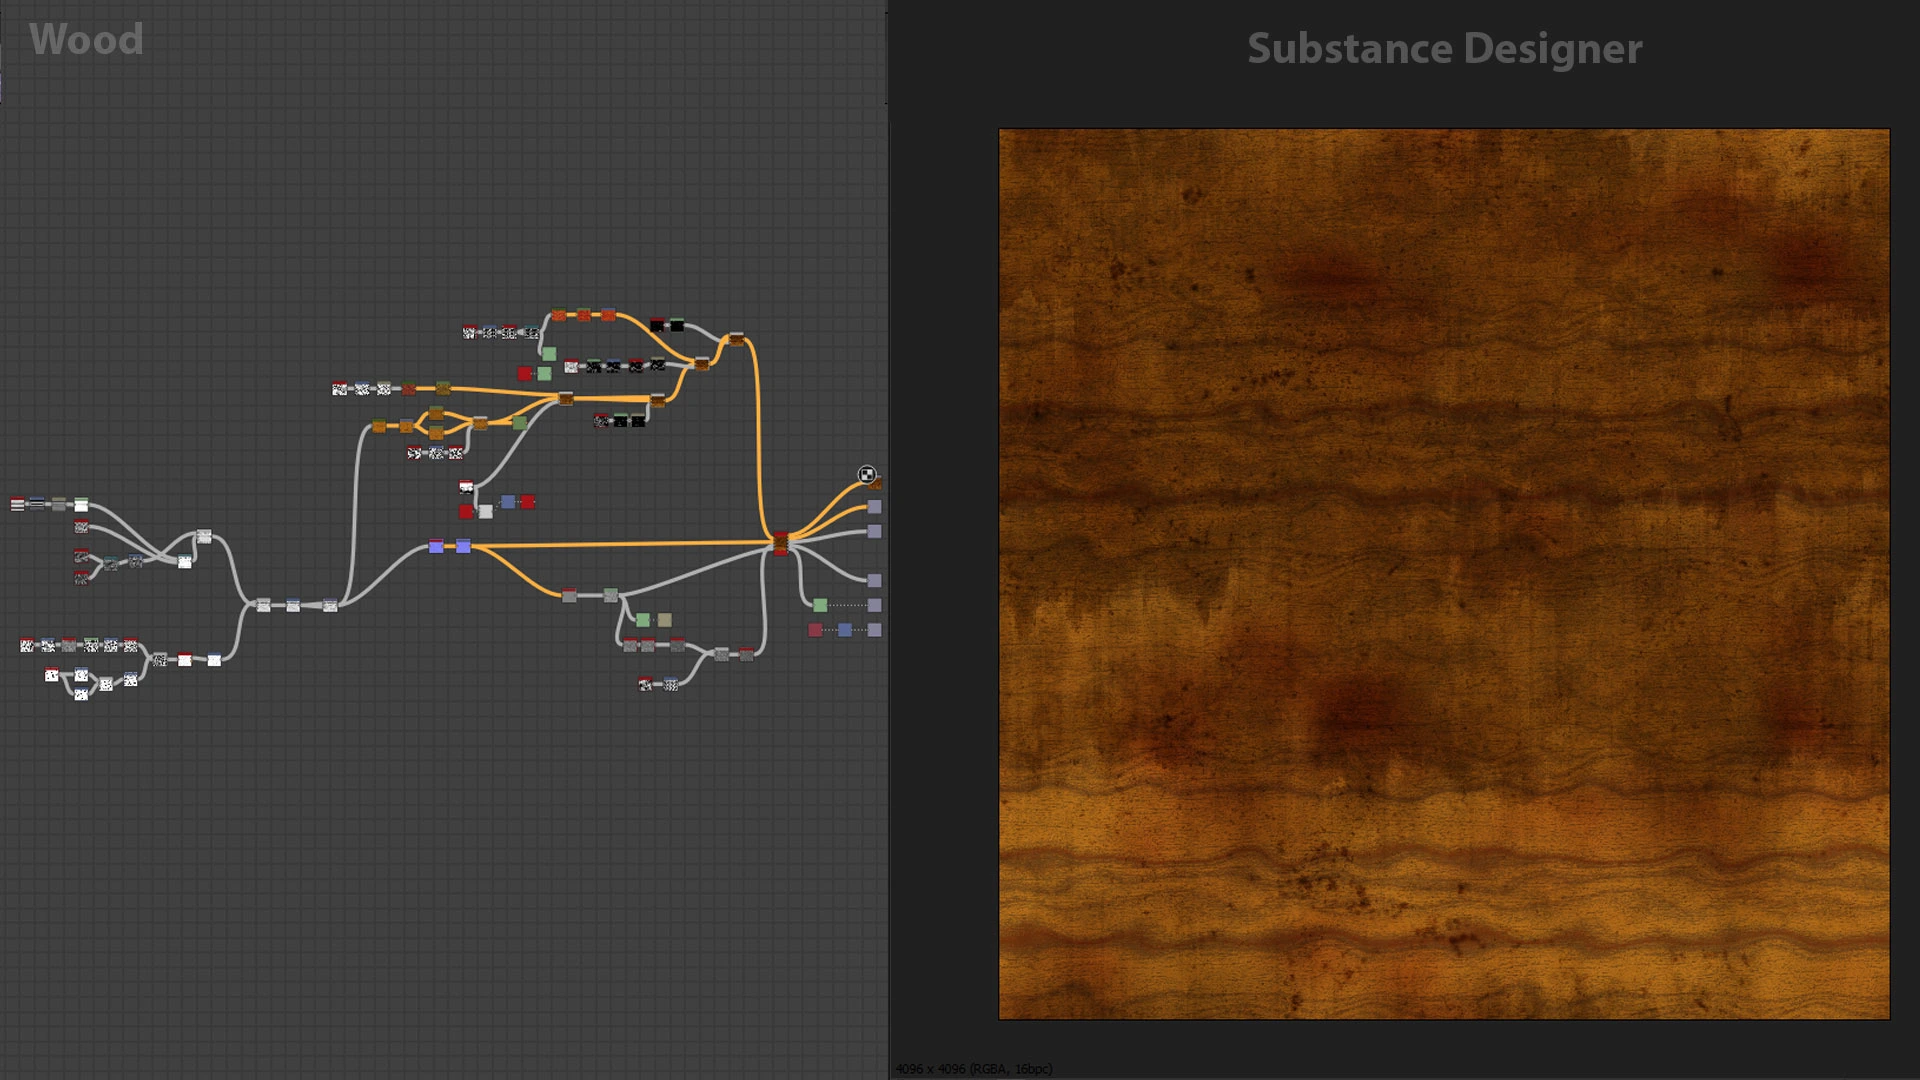
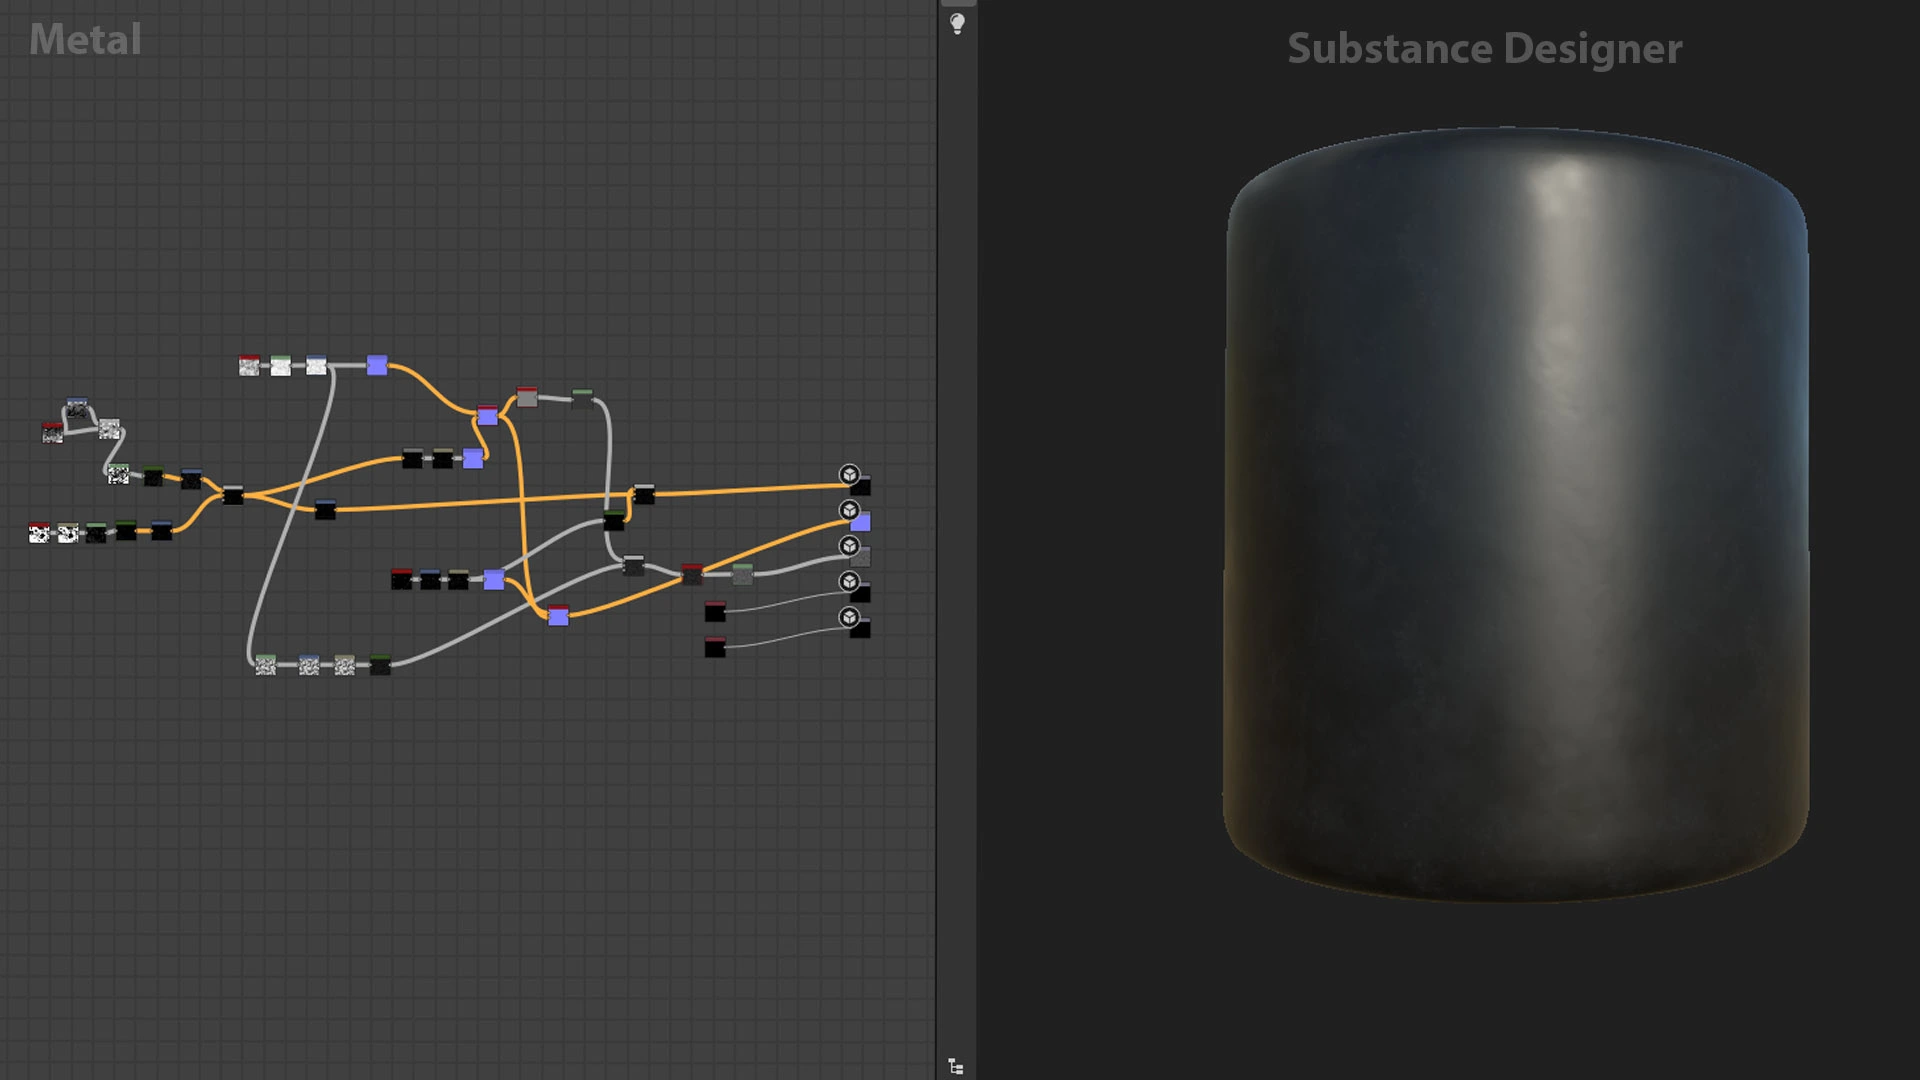
Eventually, the whole process of creating PBR textures in Substance Designer and exporting them to softwares like Unity, Unreal and Substance Painter to change their properties seemed magical to me.
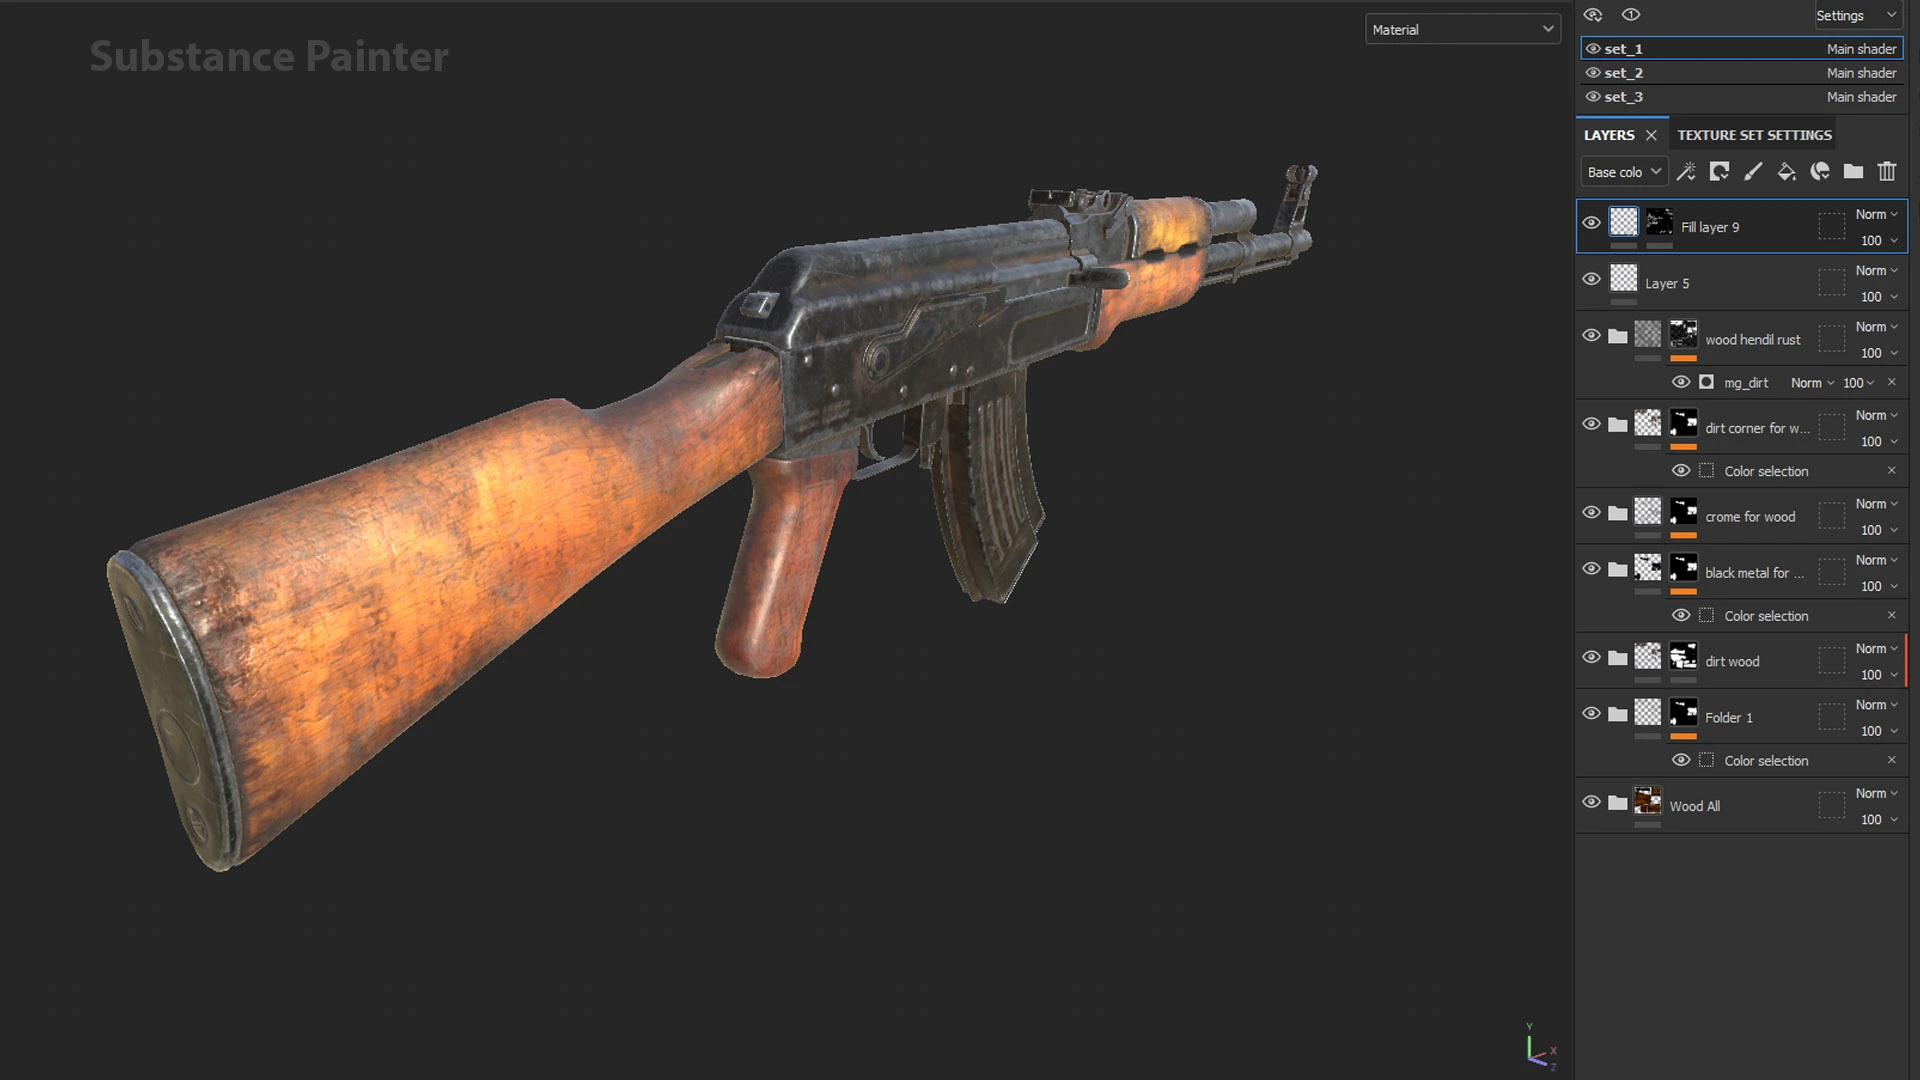
Texturing
After creating the base shader wood and metal in Substance Designer, I now had to do further texturing in Substance Painter.
Here’s something I realized in the process:
- Power of observation - This is very important. Studying real-world objects helps with translating observations into 3D assets through tools. The mind makes a visual image which subconsciously shows in the work.
- Practicing - There is no substitute for consistently practicing in order to leverage a tool fully.
- Confusion - You may work on textures for the longest time, but being satisfied takes even longer. Even after working on this for several days, I did not understand what was good and what was bad in it.
- Peer review - Because of 3 above, I began taking feedback from other 3D artists to understand the problems.
- Textures get better gradually and eventually.
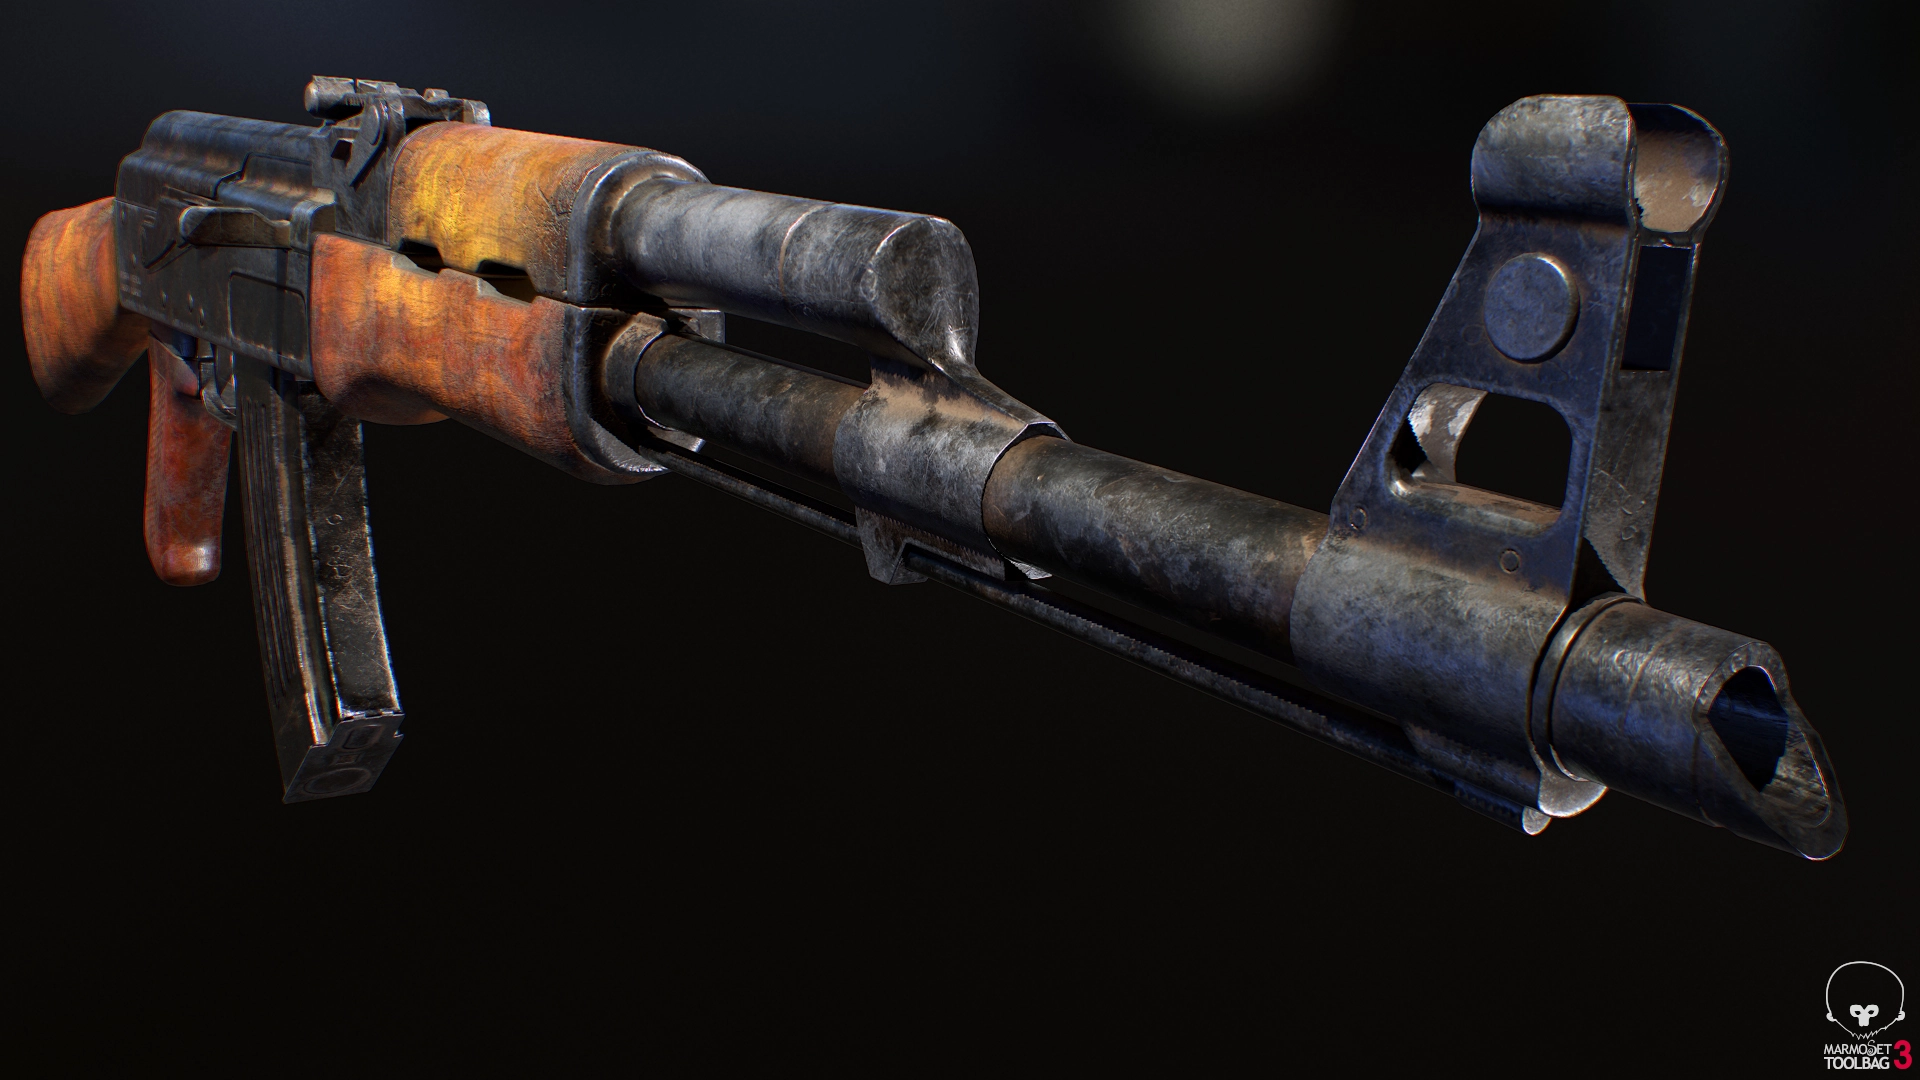
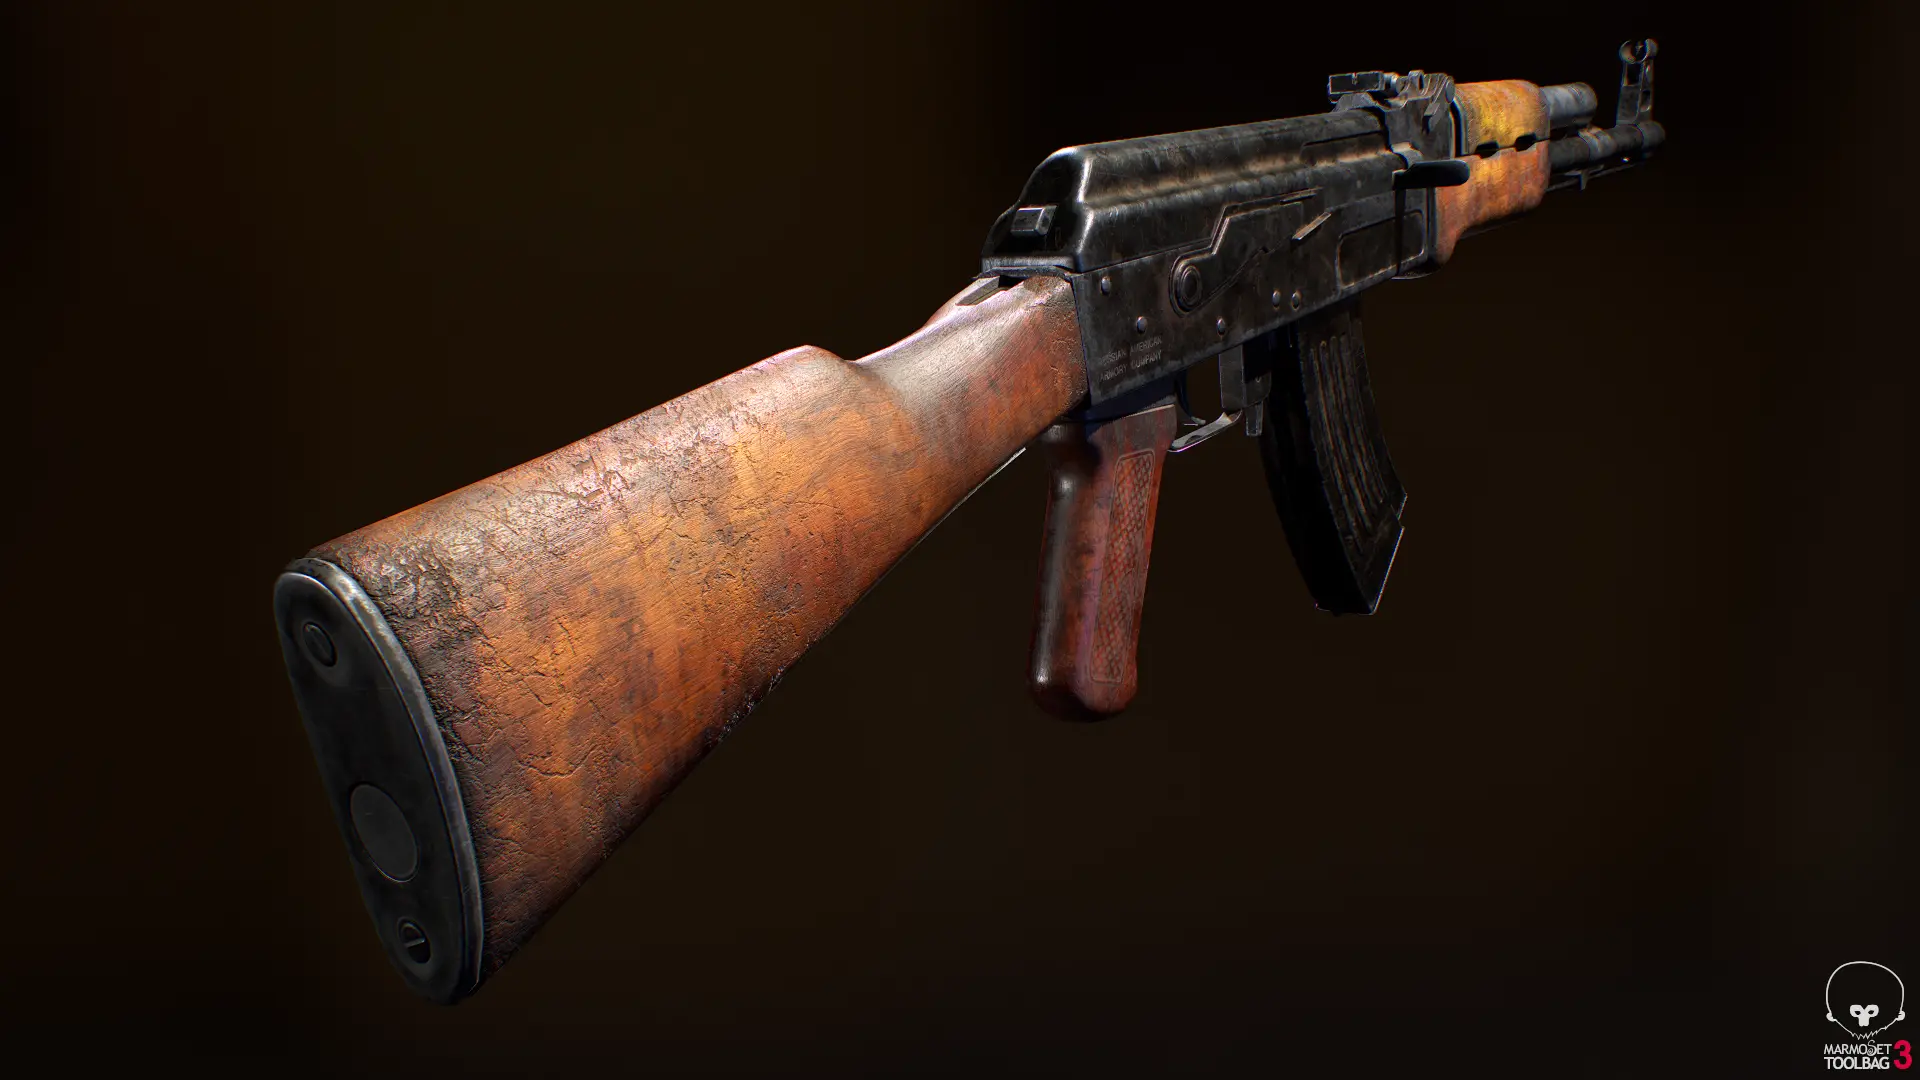
The Final Output
Just as it is important to get the model and texture right, so it is that the lighting and presentation are perfect. I used Marmoset Toolbag software. It has fantastic in-built shaders and is a real-time renderer, which means what you see is what you get. This is good for 3D game artists sending their work to Unreal, Unity, or any other game development engine that uses a PBR system.
Imitating reality to make a 3D asset look real is not an easy task, and there is always scope for improvement. As a 3D artist I understand and accept that. Thanks to this AK-47 model, I ended up learning a lot!
At Logic Simplified, we have assisted over 100 businesses globally, with our expertise in gaming and emerging technology solutions. We are a sought after Unity and Unreal game development company. We leverage the latest tools and technologies, and combine them with our scalable design philosophy, competitive cost and flexible engagement models. Get in touch with us or call now to share your project ideas.